
Integrate Insightly with Magento 2
Insightly is a CRM software, suitable for small and medium enterprises. Insightly supports store owners to control information, take care customers and make a working plan. This software helps you check the time of completing tasks, manage projects, progress working process. Furthermore, it is used easily and can keep track of customers from various sources such as website, email, personal account, etc. Currently, Magento 2 does not support integrating Insightly. To overcome this limitation, Mageplaza developed Webhook extension helping integrate Insightly with Magento 2.
What Is Webhook?
Webhook is basically user-defined HTTP callbacks which are triggered by specific events. When a trigger event occurs in the source site, the webhook sees the events, collect the data and sends it to the URL in the form of an HTTP request.
Webhook Extension for Magento 2
Unlock the power of Magento 2 Webhook today and enhance the flexibility and interactivity of your website!
Check it out!Table Of Content
- What Is Webhook?
- About Insightly
- How To Integrate Insightly With Magento 2 With Webhook
- The Result Shown At Insightly
- Available Body Templates
- Conclusion
Entities of Magento which Webhook supports:
- Customer
- Order
- Invoice
- Shipment
- Credit Memo
- Product
- Category
- Abandoned Cart
Entities which Insightly supports:
- Contacts
- Organizations
- Tasks
- Leads
- Notes
- Opportunities
- Projects
- Customers
- Orders
- User
How To Integrate Insightly With Magento 2 With Webhook
Instructions For Registering And Using Insightly
Access here, then click Try to Free to register > complete information of fields > click CREATE MY ACCOUNT button to finish registration.

After Signing up successfully, click the icon of your account on the upper right corner, select User Settings
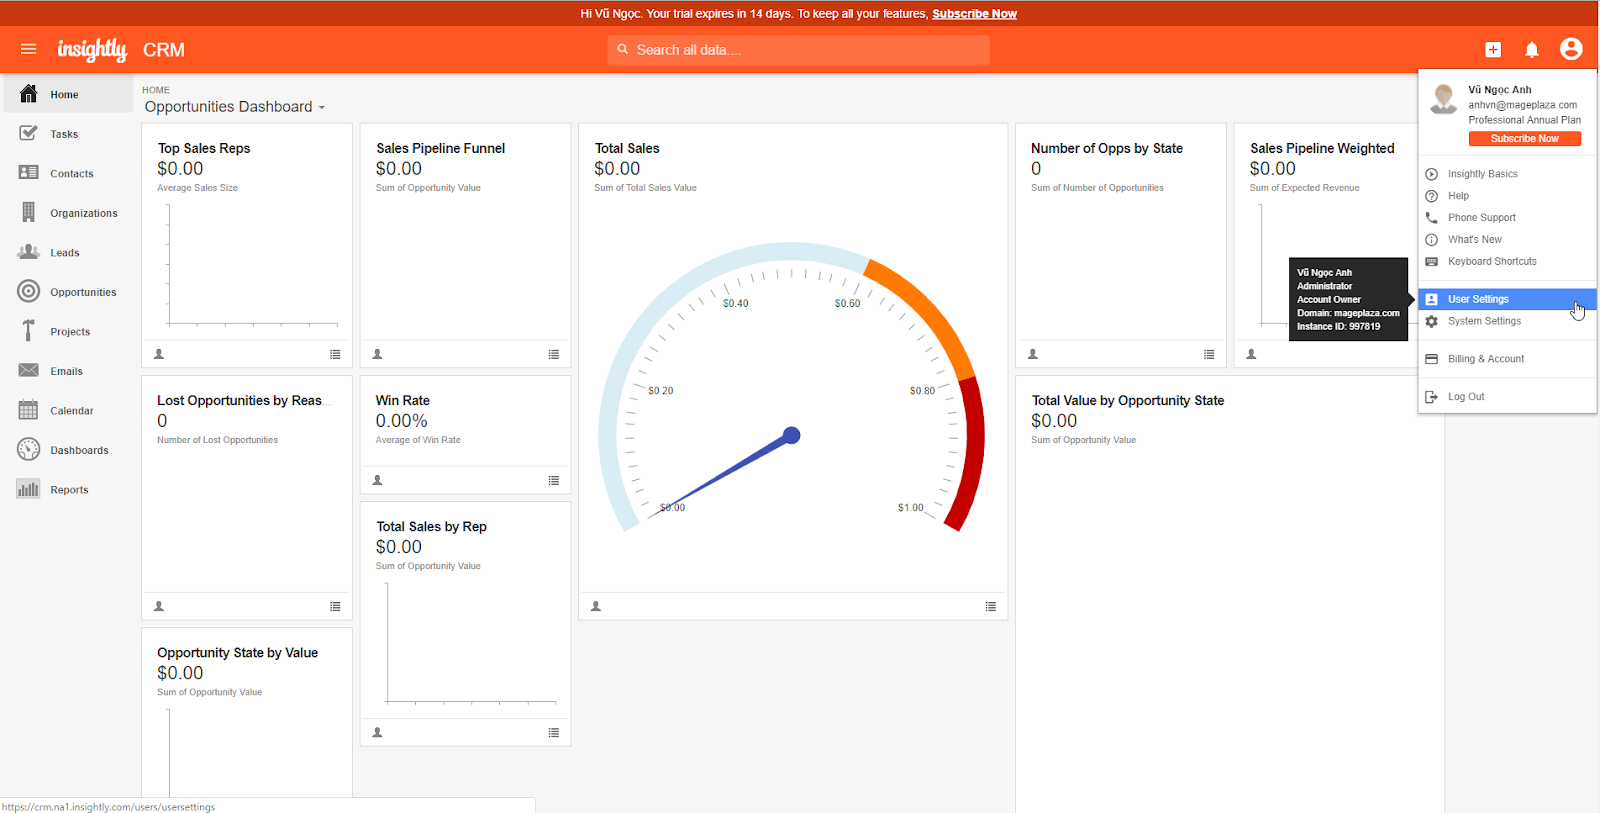
Scroll to the end of the page to see your AIP Key
You can change your API Key by clicking Generate new API Key

Data Fields Of Insightly
To view the latest fields of Insightly, you can click here
Instructions For Creating Hook
How to create a new contact in Insightly via Magento 2
- Required fields
- First_name
- Optional fields
- Last_name
- Organization
- Title
- Phone
- Home_phone
- Mobile_phone
- Other_home
- Assistant_phone
- Assistant_ame
- Fax
- Mailing_address
- Other_address
- Dates_to_remenber
- Date_of_birth
- Description
In this section, we will instruct you how to configure Webhook integrating with Insightly
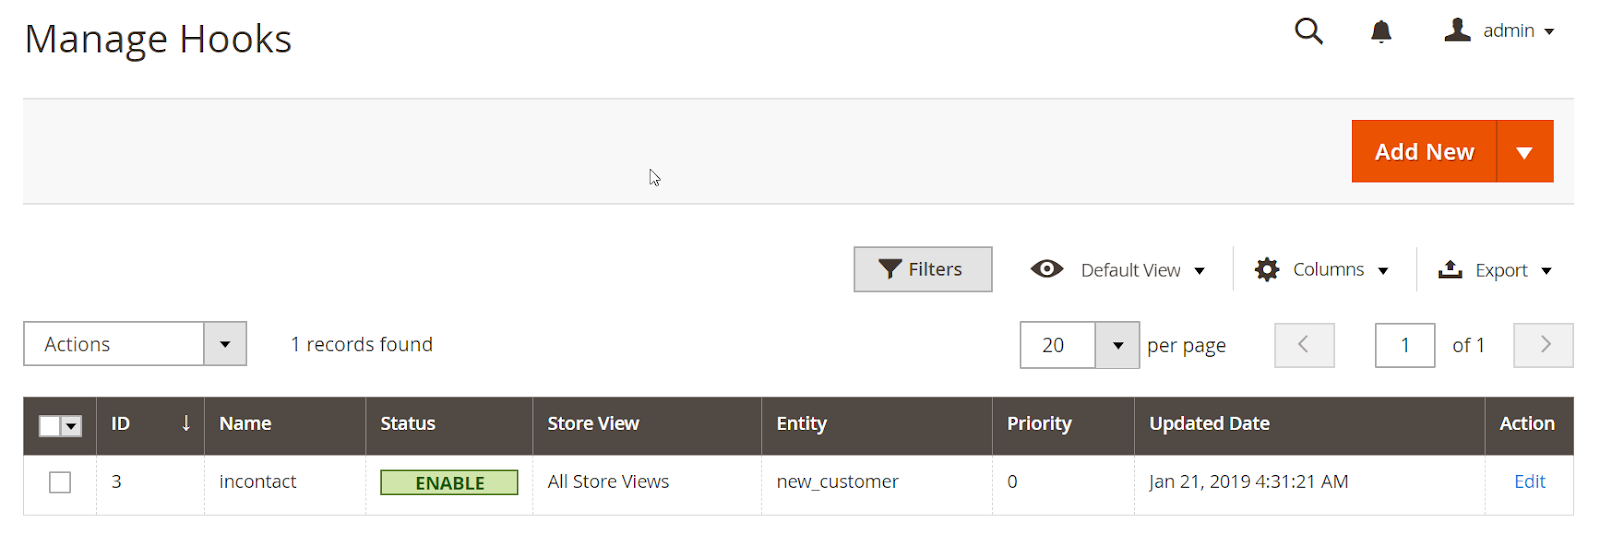
From the Admin Panel go to System > Webhook > Manage Hooks, on the right corner, select Add New with options including New Order, New Customer, Update Customer, Delete Customer, New Order, etc.
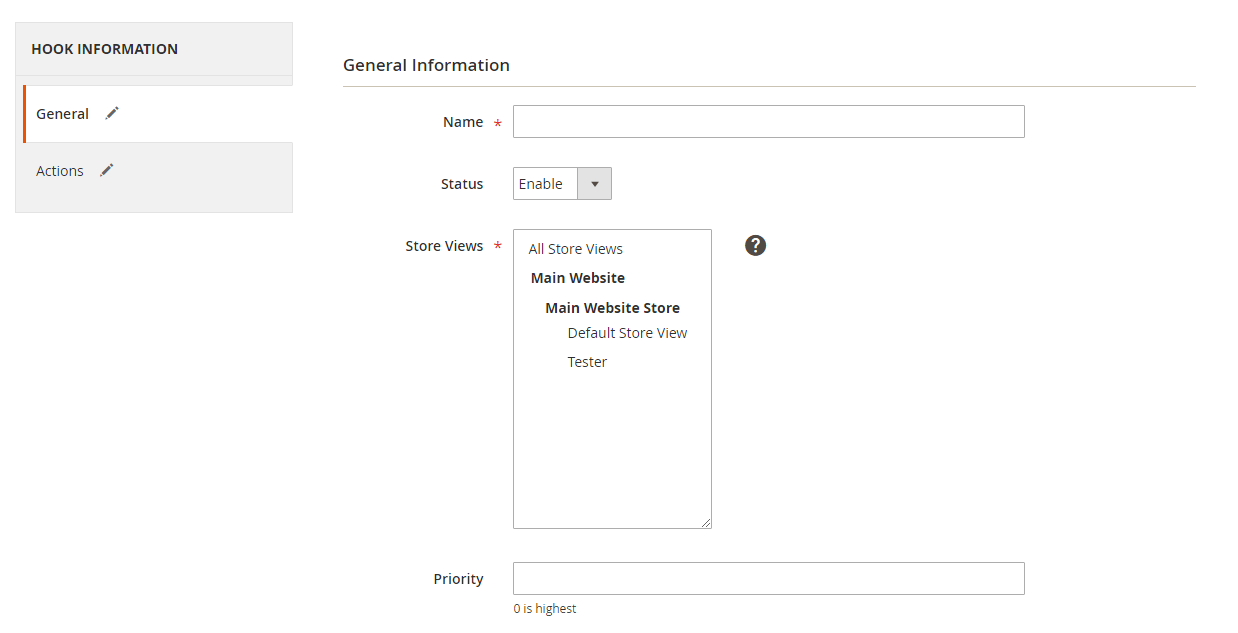
Step 1: Fill all information in the General Information tab
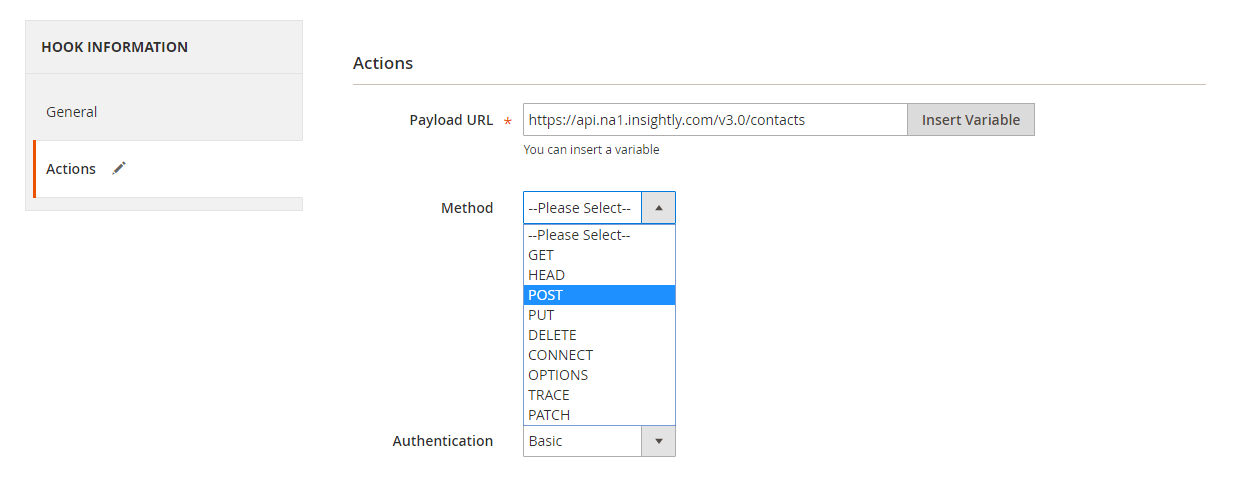
Step 2: Enter the data on the Action tab

Note:
- Payload URL: Use the link you got from Insightly which you registered:
-
Method POST: https://api.na1.insightly.com/version/{entity} For instance, with the entity is contacts, Payload URL: https://api.na1.insightly.com/version/contacts
-
Other methods: are applied the same. The version is your current Insightly version
-
-
Authentication = Basic
- With Username = Key API from your Insightly account and let the Password field blank
- Body
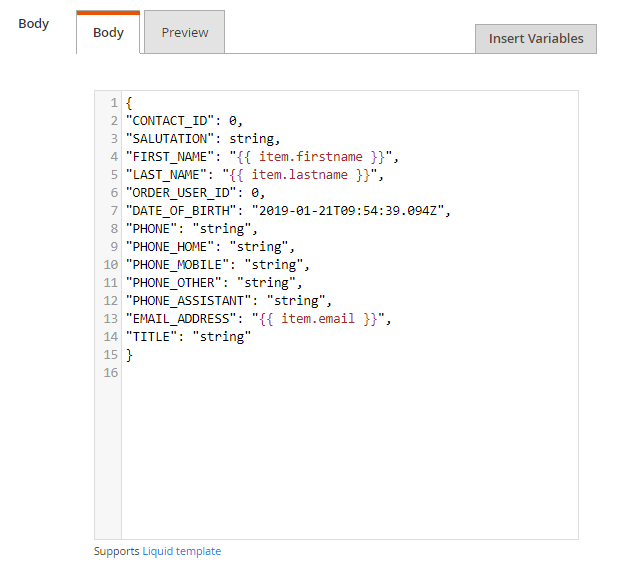
With methods such as POST or PUT, you need to insert content to the content section to send a request. Click Insert Variable to select a variable. For instance, when using the POST method to create a new customer on Magento 2 and that new customer will be integrated into a new contact of Insightly, you need to insert the below body section:
 {
"FIRST_NAME": "",
"LAST_NAME": "",
"DATE_OF_BIRTH": "2019-01-21T09:54:39.094Z",
"PHONE": "string",
"PHONE_HOME": "string",
"PHONE_MOBILE": "string",
"PHONE_OTHER": "string",
"PHONE_ASSISTANT": "string",
"EMAIL_ADDRESS": ""
}
Note: When you need to get any data field, replace “string” value with a variable form Insert Variable.
The result of creating a hook:
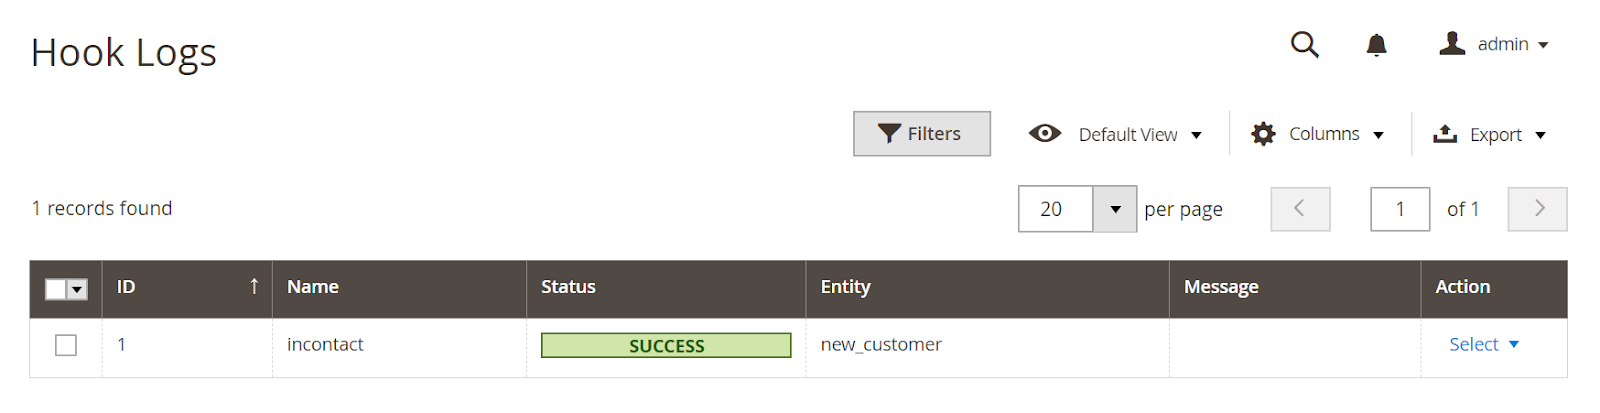
When some events are performed on Store such as adding a new customer, data information will be saved at Hook Logs:
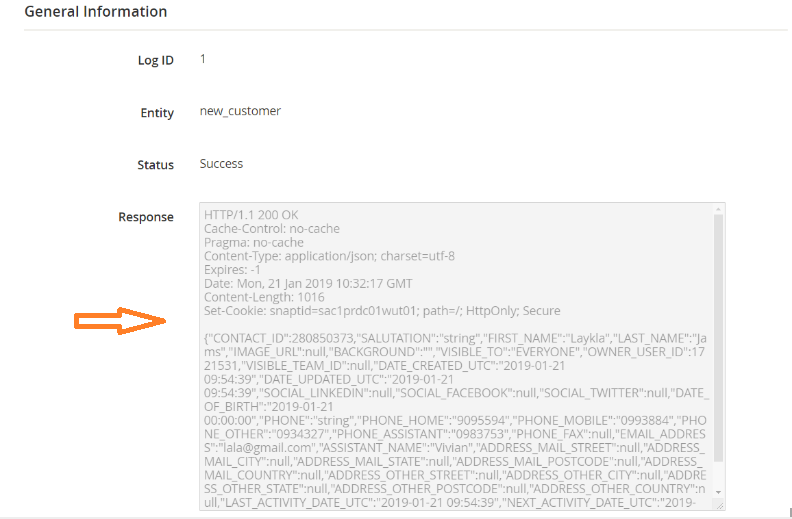
Click Select > View, you will be redirected to the view log page to view data information:
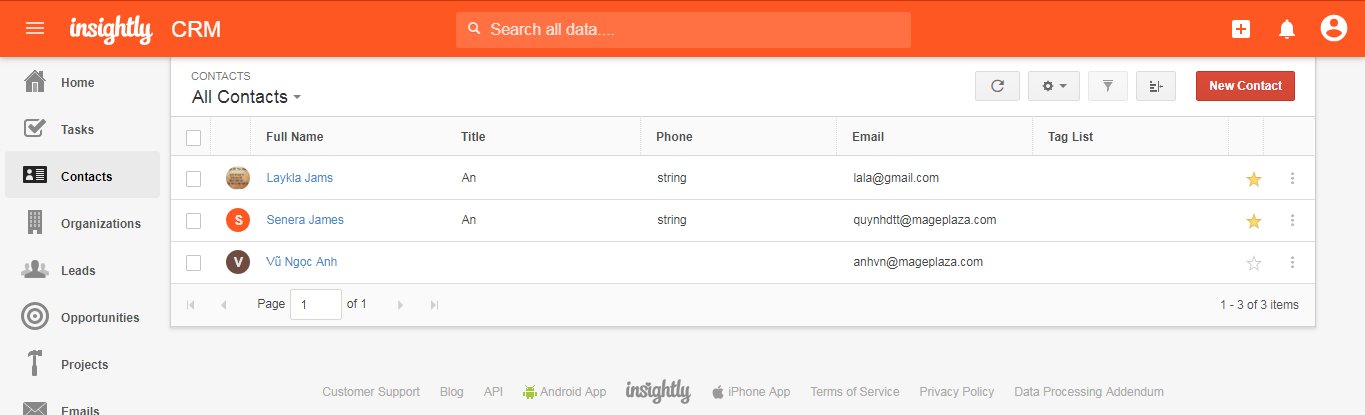
The Result Shown At Insightly
Available Body Templates
New Lead
End Point: POST/ leads
- Required fields:
- LAST_NAME
- LEAD_STATUS_ID
- LEAD_SOURCE
- Optional fields:
- FIRST_NAME
- TITLE
- ORGANIZATION
- USER_RESPONSIBLE
- LEAD_RATING
- EMAIL_ADDRESS
- PHONE
- MOBILE_PHONE
- FAX
- WEBSITE
- INDUSTRY
- NUMBER_OF_EMPLOYEES
- ADDRESS
- DESCRIPTION
- TAG_LIST
Body template
   {
    "FIRST_NAME": "string",
    "LAST_NAME": "string",
    "LEAD_STATUS_ID": 0,
    "TITLE": "string",
    "ORGANISATION": string,
    "EMAIL": "string",
    "EMPLOYEE_COUNT": 0,
    "FAX": "string",
    "INDUSTRY": "string",
    "LEAD_RATING": 0,
    "MOBILE": "string",
    "PHONE": "string",
    "WEBSITE": "string",
    "ADDRESS_STREET": "string",
    "ADDRESS_CITY": "string",
    "ADDRESS_STATE": "string",
    "ADDRESS_POSTCODE": "string",
    "ADDRESS_COUNTRY": "string",
     "ORGANISATION_NAME": "string",
    "CUSTOMFIELDS": [
      {
        "FIELD_NAME": "string",
        "FIELD_VALUE": {}
      }
    ],
    "TAGS": [
      {
        "TAG_NAME": "string"
      }
    ]
  }
Note: When you need to get any data field, replace “string” value with a variable form Insert Variable.
Conclusion
We have instructed you how to register Insightly and create Hook when using Webhook Extension of Mageplaza as well as how to integrate Webhook with Insightly. You can view more functions for your store here.
Back Ask Mageplaza