
Integrate Freshbooks with Magento 2 With Webhook
FreshBooks is useful a cloud-based accounting software that helps small businesses, as Magento 2 stores run easily, fast, and securely. With an easy-to-use interface, FreshBooks users can capture their expense, send invoices, and get paid quicker from any web brochures. Currently, Magento 2 does not support integrating FreshBooks with Magento 2, so Mageplaza develops Webhook extension which has the ability to integrate FreshBooks with Magento 2.
What Is Webhook?
Webhook is a helpful tool which allows online stores to configure to send an API request to a configurable destination (URL) such as other servers or applications in cases trigger events including new order, customer login, abandoned carts, etc occur. As a result, store owners can instantly update important notifications and have suitable activities shortly.
Webhook Extension for Magento 2
Unlock the power of Magento 2 Webhook today and enhance the flexibility and interactivity of your website!
Check it out!Table of Content
- What Is Webhook?
- About FreshBooks
- How To Integrate FreshBooks With Magento 2 With Webhook
- The Result Shown In FreshBooks
- These Available Body Templates
- Conclusion
These entities of Magento which Webhook supports:
- Customer
- Order
- Invoice
- Shipment
- Credit Memo
- Product
- Category
- Abandoned Cart
These entities which FreshBooks supports:
- Business, Roles, and Identity
- Clients
- Estimates
- Expenses
- Expense Categories
- Gateways
- Invoices
- Invoice Profiles
- Items
- Other Income
- Payments
- Projects
- Reports
- Staff
- Systems
- Tasks
- Taxes
- Time Entries
How To Integrate FreshBooks With Magento 2 With Webhook
Instructions For Registering And Using FreshBooks
Instructions For Registering FreshBooks
Access to here, click the Try it free button > enter email and password > click the Get Started button

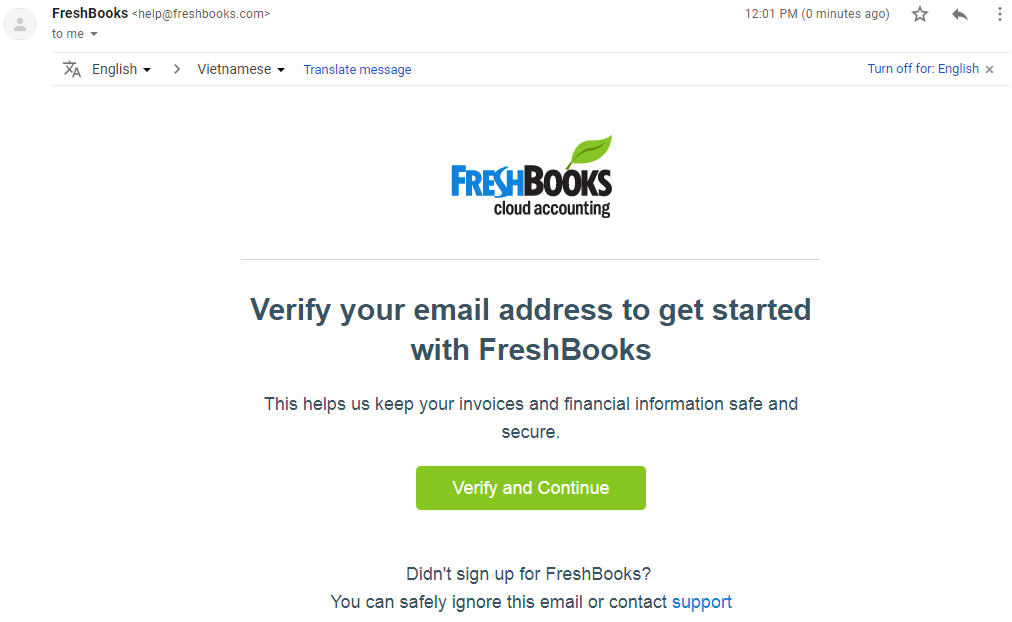
Please check your email associated with your FreshBooks account for the verifying email from FreshBooks.
Open this email and click the Verify and Continue button
Then, you will be directed to the below page. Please enter your information and click the Save and Continue button.

Then choose your industry to customize your experience

Instructions For Identifying Access Token
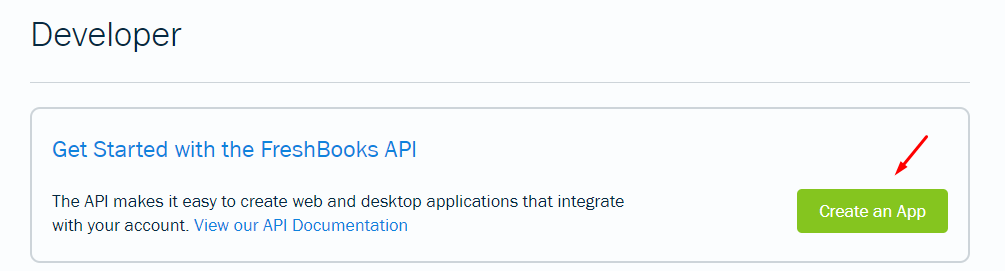
Create an App
After registering your Freshbook account successfully, you need to create an app by accessing to here then click the Create an App button
Fill all information in the below form:
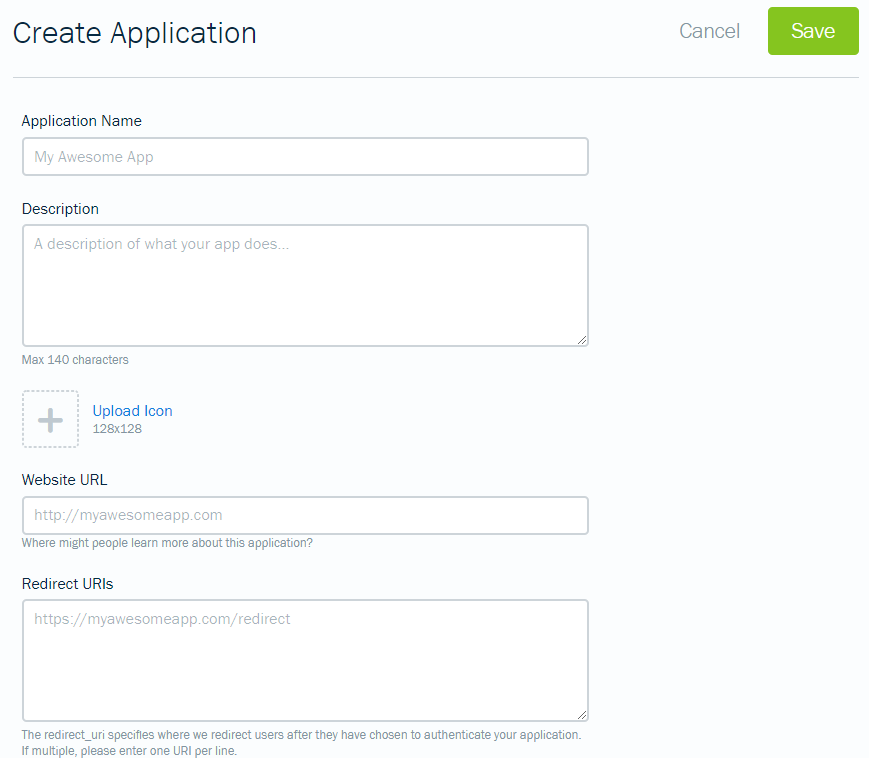
After completing this form, you create the app successfully
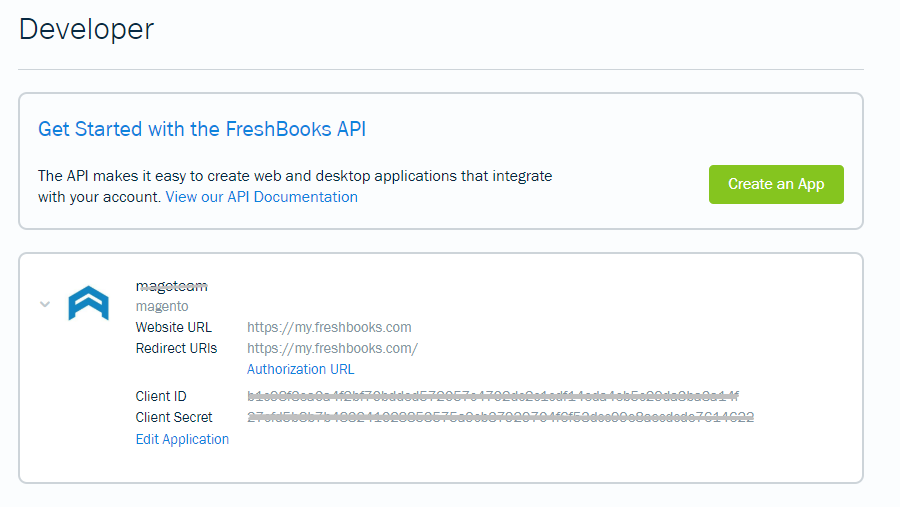
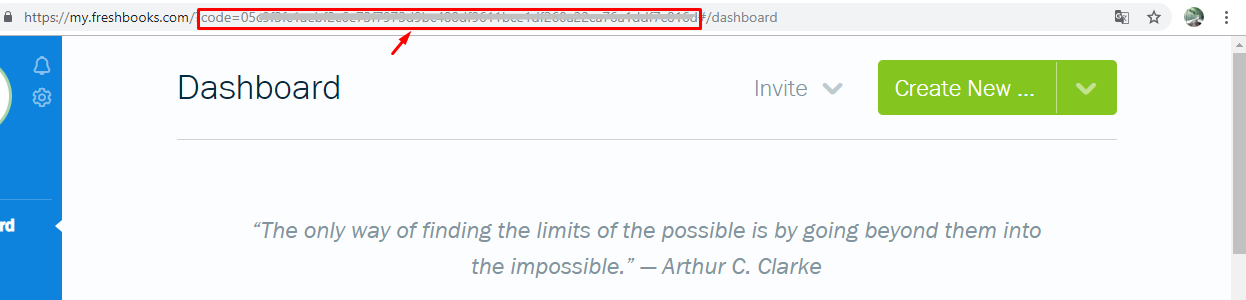
Click to Authorization URL to move to Redirect URLs page, and you will see Authorization_code (marked with a red rectangle, as below image:
Use Webhook extension to identify access_token
From the Admin Panel, go to System > Webhook > Manage Hooks, select Add New on the right corner, then you will see many options including New Order, New Customer, Update Customer, Delete Customer, etc.
For instance, I choose New Order to add new order comment,
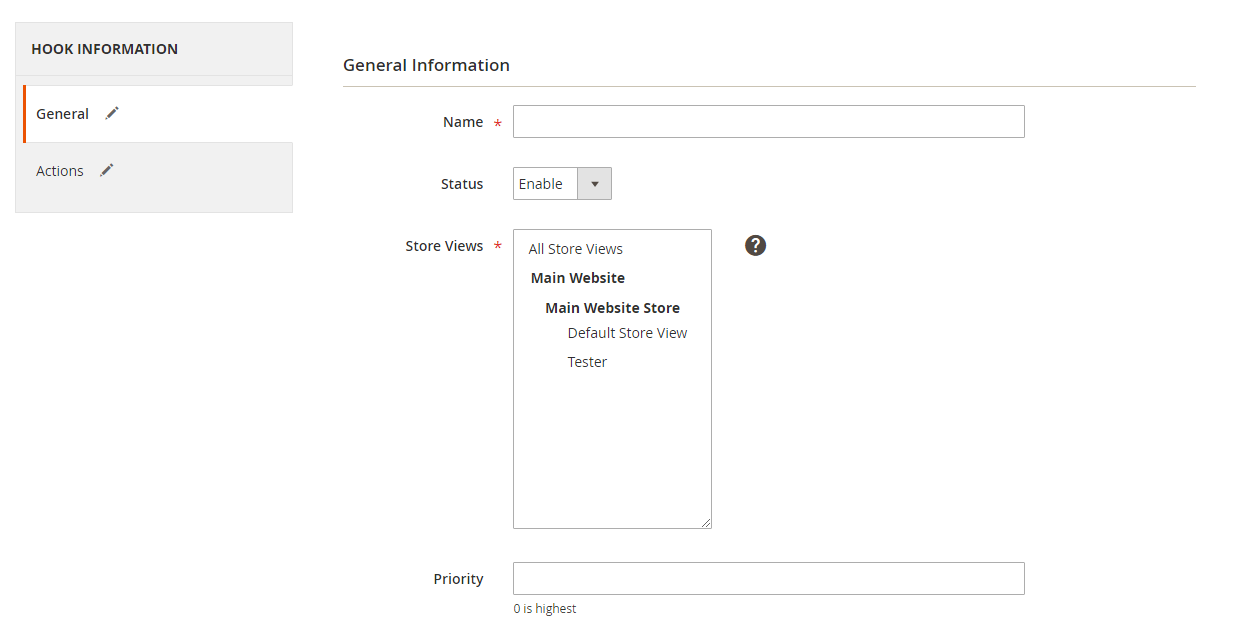
- Step 1: Fill all information in the General Information tab
- Step 2: Enter the data on the Action tab
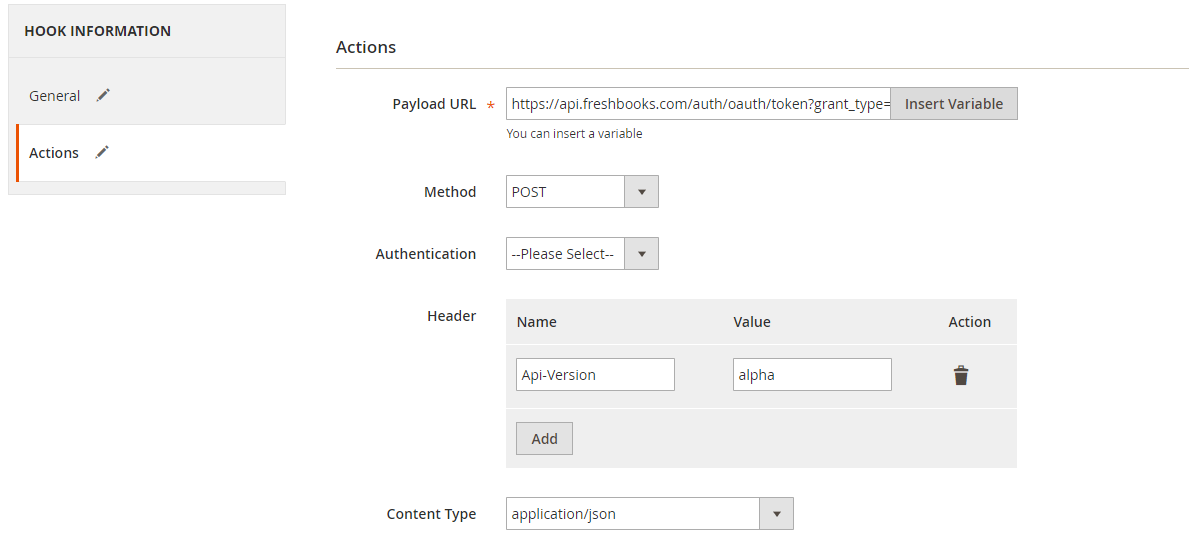
Note: In this part, you need to fill the following information:
- Payload URL: https://api.freshbooks.com/auth/oauth/token?grant_type=authorization_code&client_secret=
&code= &client_id= &redirect_uri= Where: -
, , coming from the App which you create in above part. -
: you can find according to the above instruction.
-
- Method: POST
- Header:
- Name: Api-Version
- Value: alpha
- Content Type: application/json
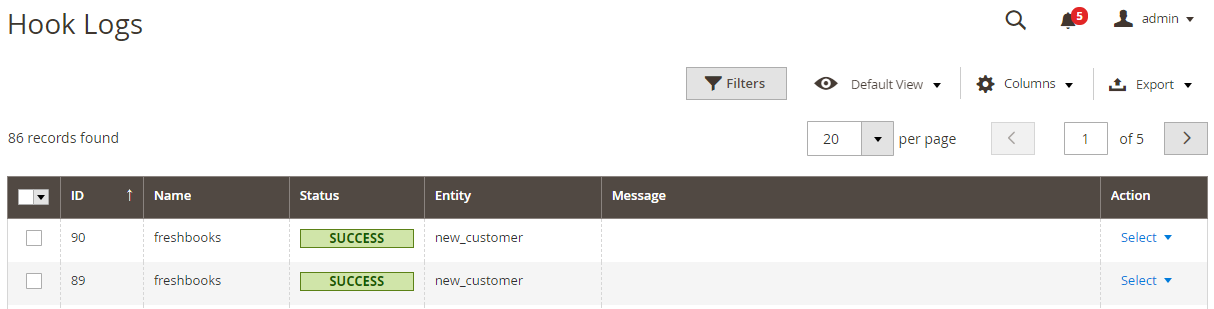
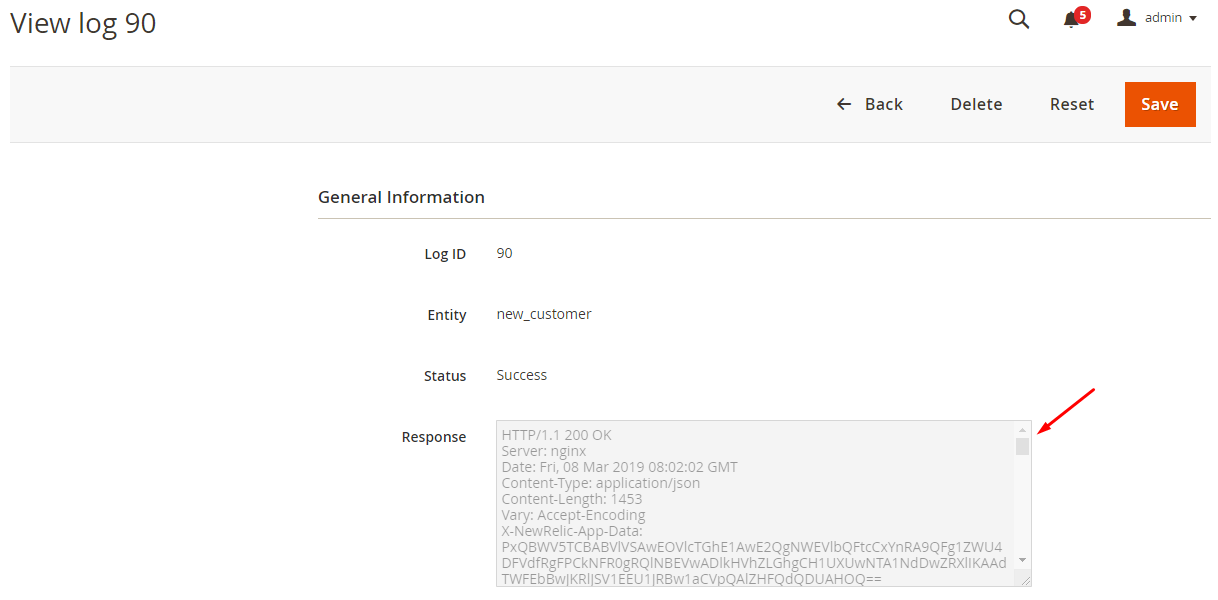
After creating Hook successfully, comment on an order randomly > Click to System > Webhook > Logs
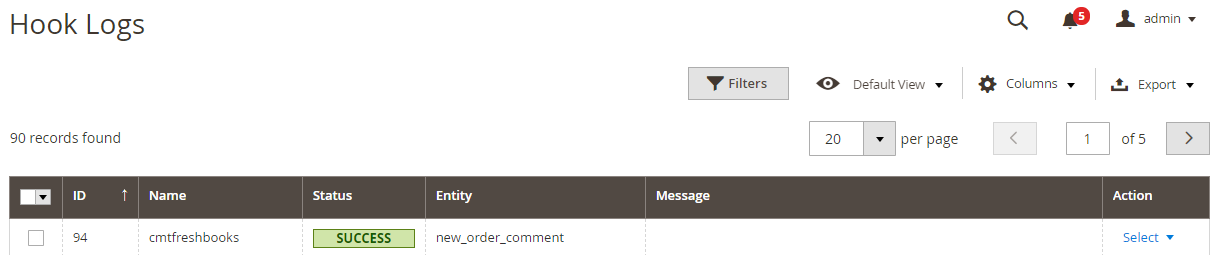
Click Select > View

In Response part, you will see access_token (marked with red arrow) as the above image.
These Fields Of FreshBooks
To view the latest fields of FreshBooks, you can click here
Instructions For Creating Hook
How to create a new client in FreshBooks via Magento 2
-
Required fields: (at least one of these below fields is required)
- fname
- lname
-
Optional field:
- accounting _systemid
- allow_late_fees
- allow_late _notifications
- bus_phone
- company_industry
- company_size
- currency_code
- direct_link_token
- fax
- home_phone
- id
- language
- last_activity
- last_login
- level
- mob_phone
- note
- notified
- num_logins
- organization
- p_city
- p_code
- p_country
- p_province
- p_street
- p_street2
- pref_email
- pref_gmail
- s_city
- s_code
- s_country
- s_province
- s_street
- s_street2
- signup_date
- statement_token
- subdomain
- updated
- userid
- username
- vat_name
- vat_number
- vis_state
In this part, I will give detail instructions on how to configure Webhook which helps Magento 2 integrate with FreshBooks.
From the Admin Panel, go to System > Webhook > Manage Hooks, select Add New on the right corner, then you will see many options including New Order, New Customer, Update Customer, Delete Customer, etc.
Step 1: Fill all information in the General Information tab

Step 2: Enter the data on the Action tab
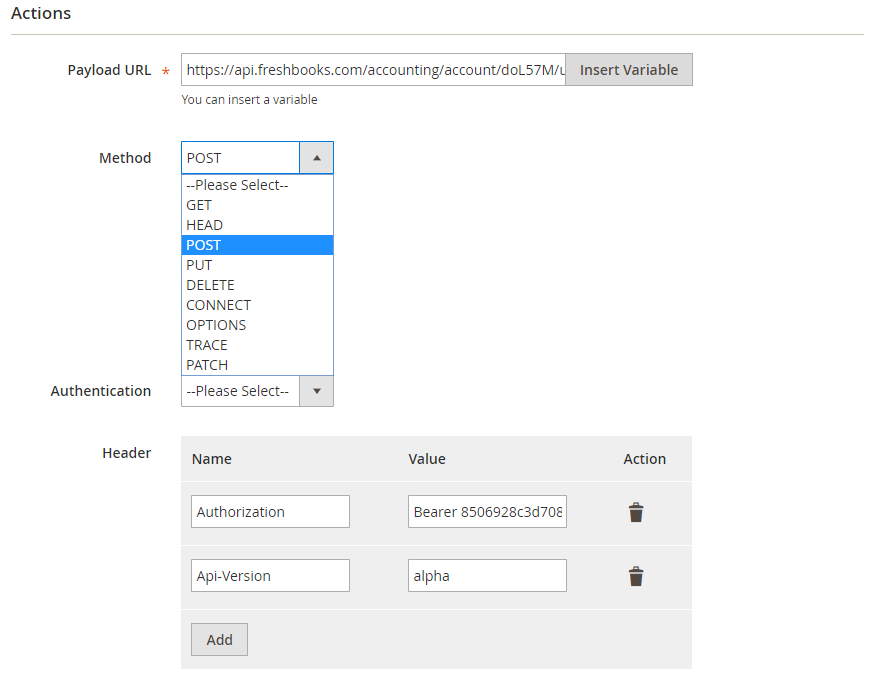
Note:
-
Payload URL:
- POST: https://api.freshbooks.com/accounting/account/
/users/clients - GET: https://api.freshbooks.com/accounting/account/
/users/clients/ With is account id of your FreshBooks account, is id of client.
- POST: https://api.freshbooks.com/accounting/account/
-
Header:
- Name: Authorization, Value: Bearer
, with is access token which you can find according to the above instruction. - Name: Api-Version, Value : alpha
- Name: Authorization, Value: Bearer
-
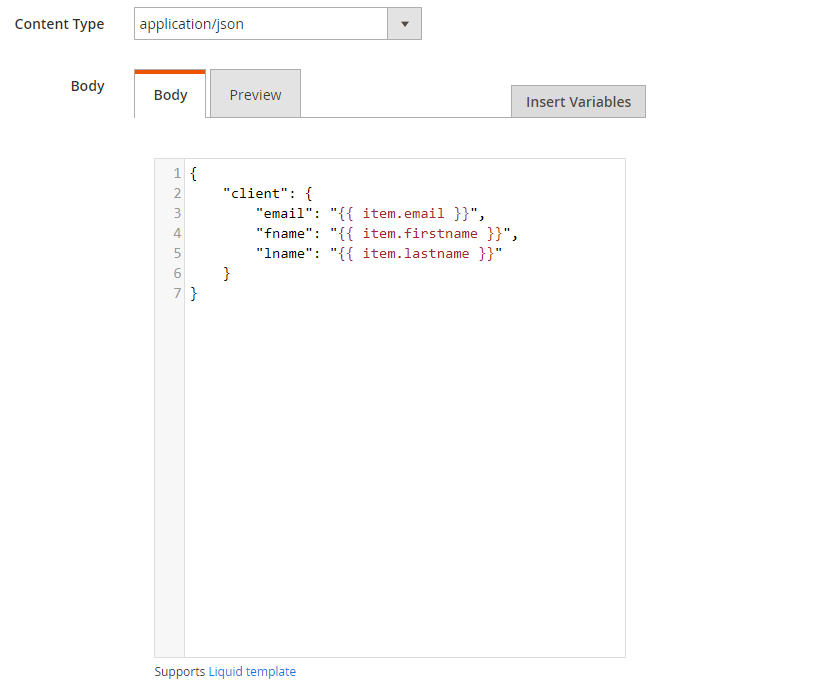
Body: With POST and PUT method, body is required.
- For example: You want a new client will come up compatibly in FreshBooks when you add a new customer in Magento 2. You need to insert the following content into the body section:
{
    "client": {
		"fname":"Jones"
		"lname":"Andrew"
        		"email": "[email protected]"
    }
}
Note: If you want to get any data field, you need to change the value of this data field with variable coming from Insert Variable.
The results of creating a hook:
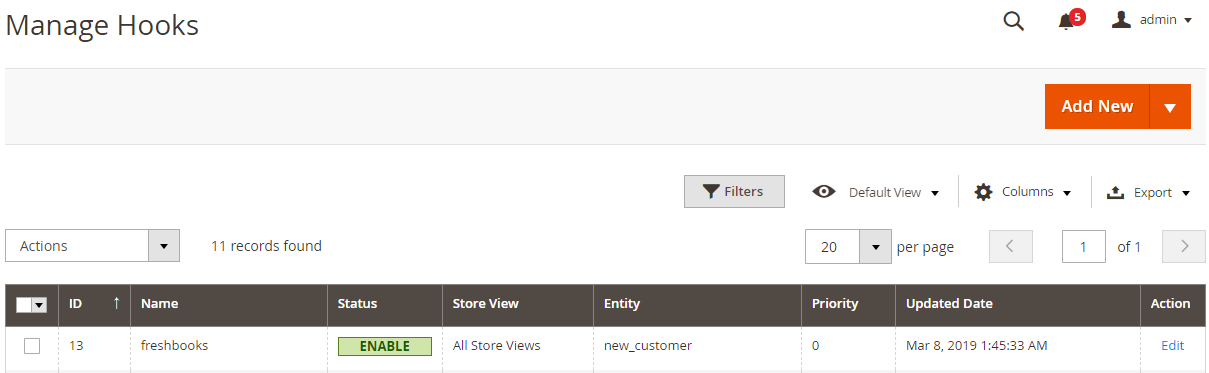
Once some events in Store such as add new customer, new order, etc occurs, the data will be saved on Hook Logs (System > Webhook > Log):
Click Select > View to redirect to View log page where you can view the data information.
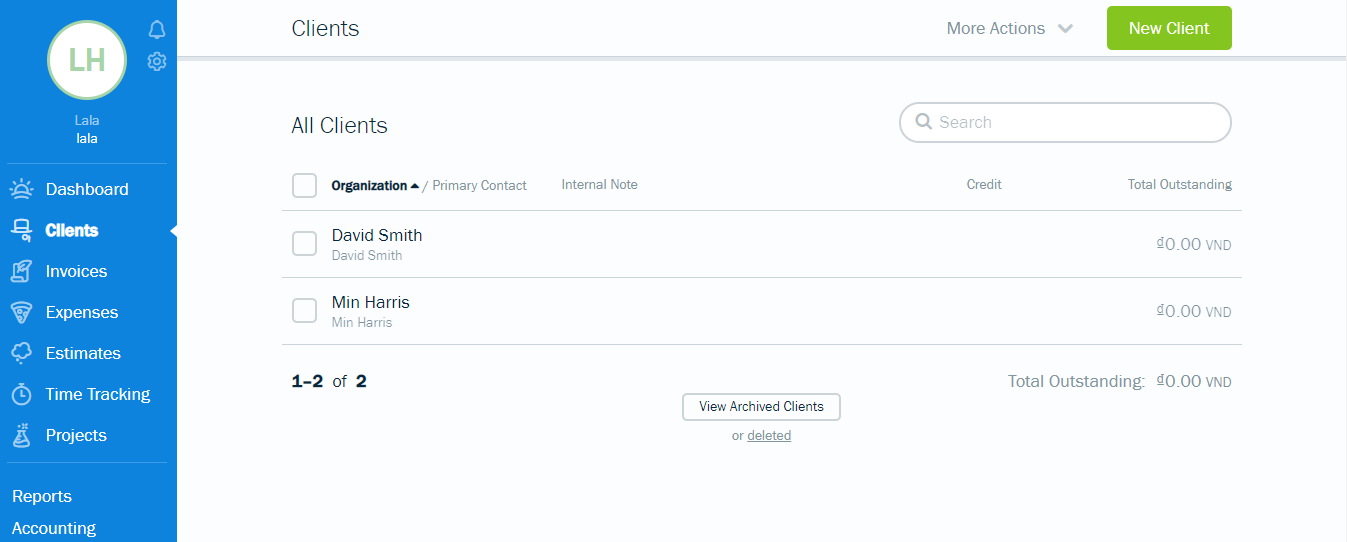
The Result Shown In FreshBooks
These Available Body Templates
New Invoices
-
Required fields:
- customerid
- create_date
-
Optional fields:
- invoice_number
- generation_date
- discount_value
- discount _description
- po_number
- template
- currency_code
- language
- terms
- notes
- address
- return_uri
- deposit_amount
- deposit_percentage
- gmail
- show_attachments
- ext_archive
- vis_state
- street
- street2
- city
- province
- code
- country
- organization
- fname
- lname
- vat_name
- vat_number
- due_offset_days
- lines
- type
- expenseid
- qty
- unit_cost
- amount
- code
- description
- name
- taxName1
- taxAmount1
- taxName2
- taxAmount2
Note:
-
Payload URL: With POST method: https://api.freshbooks.com/accounting/account/
/invoices/invoices where is account id of your Freshbooks account -
Body template:
{
  "invoice": {
    "email": "[email protected]",
    "customerid": 338441,
    "create_date": "2016-04-04",
    "lines": [
      {
        "type": 0,
        "description": "",
        "taxName1": "",
        "taxAmount1": 0,
        "name": "Paperwork",
        "qty": 1,
        "taxName2": "",
        "taxAmount2": 0,
        "unit_cost": {
            "amount": "5000.00",
            "code": "USD"
        }
      }
    ]
  }
}
Note: If you want to get any data field, you need to change the value of this field with variable coming from Insert Variable.
Conclusion
In this tutorial, we introduce how to register FreshBooks, create Hook with Mageplaza Webhook Extension, and integrate Pipedrive with Magento 2 via Webhook. In addition, you can refer to other useful extensions for your store here.
Explore Mageplaza Webhook extension now!
Back Ask Mageplaza