
How to Configure Color Swatches in Magento 2
With a big catalog of 234+ extensions for your online store
Color Swatches play an important role in motivating customers to make purchase decisions. Unlike traditional shopping where shoppers can directly see what the colors look like, in shopping online, shoppers only base their senses to make a judgment and decide whether they will buy this product or not. Because of that, online merchants need to upgrade their display method to show swatches features such as color, pattern, and texture as attractively as possible. For example, you have a shirt and it is more attractive with unique shades of color than flat colors. The more realistic the customers feel, the more products you can sell out. This color swatch can be displayed in Layered Navigation ULTIMATE. Today’s guide will give you details about How to Configure Color Swatches in Magento 2.
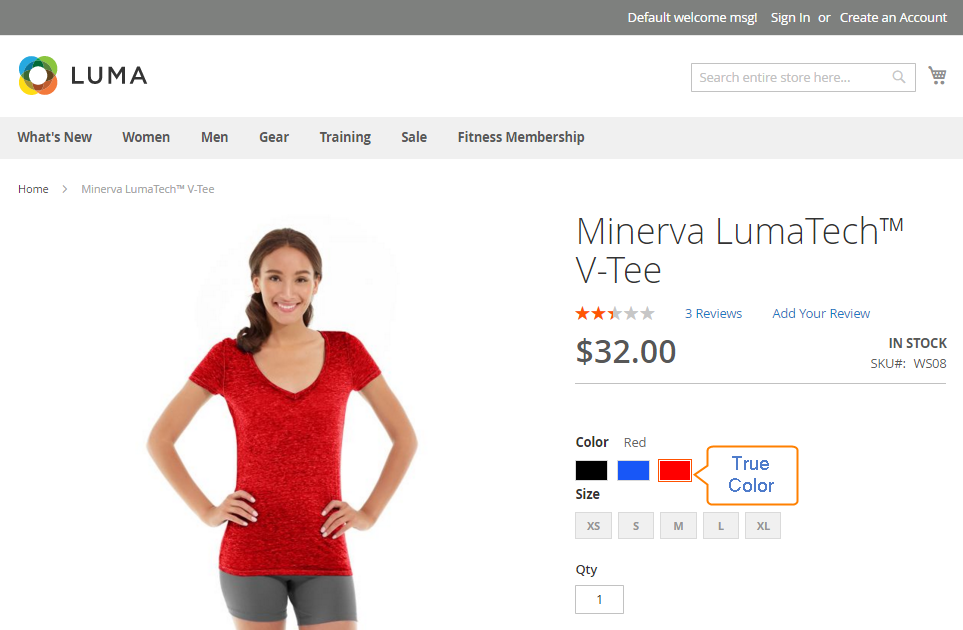
Visual Swatches
Color Swatch, or Visual Swatch in general, is a great solution for the configurable products to show customers the variety of colors, patterns or designs of your products. On the store view, the swatches of products are displayed on the catalog pages and product detail pages as the following:
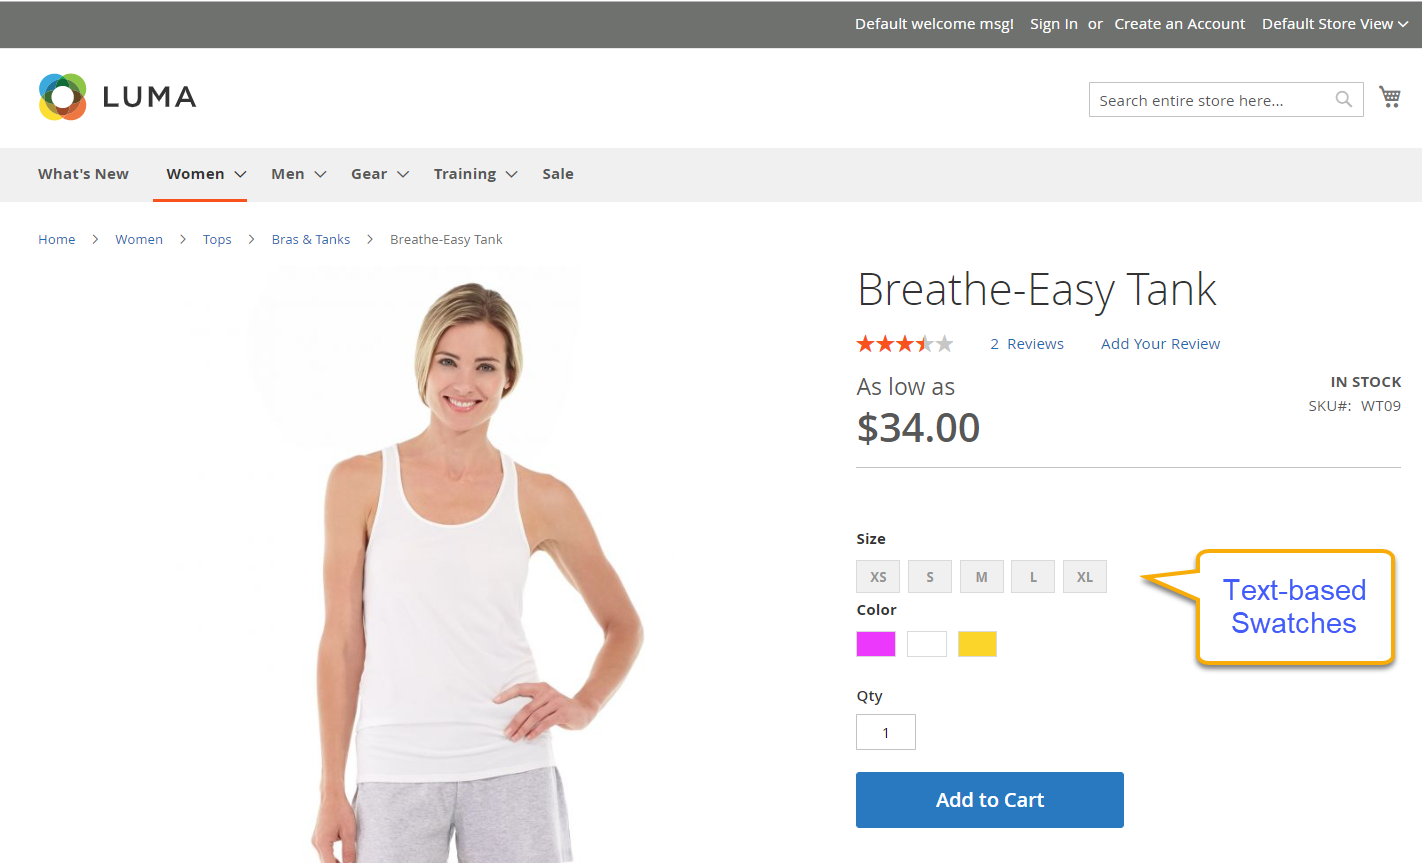
Text-Based Swatches
However, for attributes that do not have an image for swatching, you can use text-based swatches. A text-based swatch is often shown as a button with a text label, and plays a role in the same way as a swatch with an image. In the following picture, size is a text-based swatch.
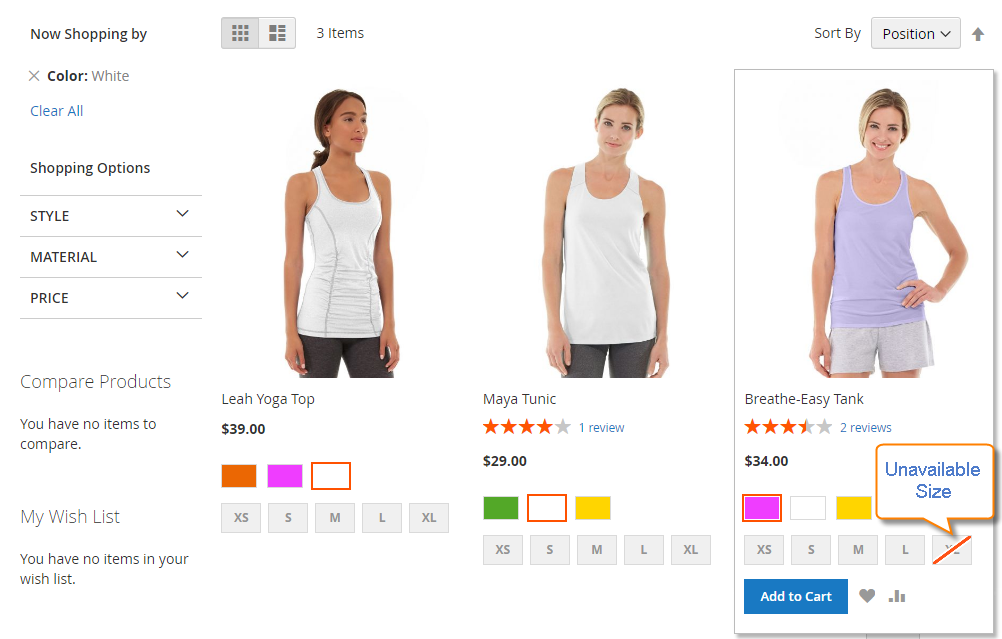
When text-based swatches are used to show the available sizes, any size that is not available is crossed out.
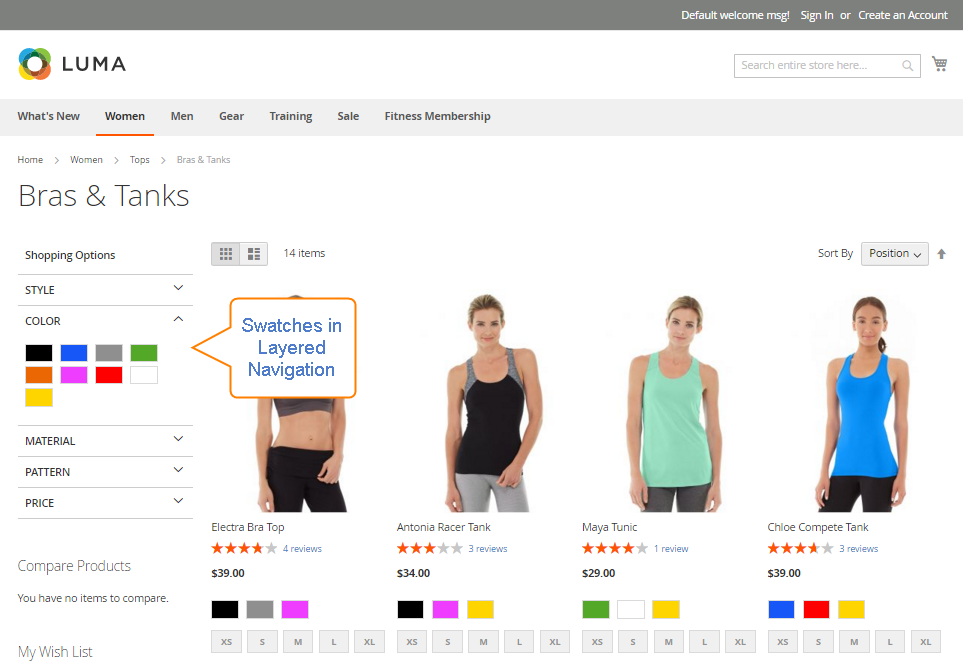
Swatches in Layered Navigation
The swatches including color swatches and text-based swatches can be also used in the layered navigation or Layered Navigation on Marketplace
3 Steps to configure swatches in Magento 2
Now, let’s start configuring swatches for your store:
Step 1: Create the Swatches
Apply one of the following methods to create the swatches.
Method 1: Add a Color Swatch
- Identify the exact color for your product.
- On the Admin sidebar,
Stores > Attributes > Product. - In the grid, find and edit the
Colorattribute. - Set
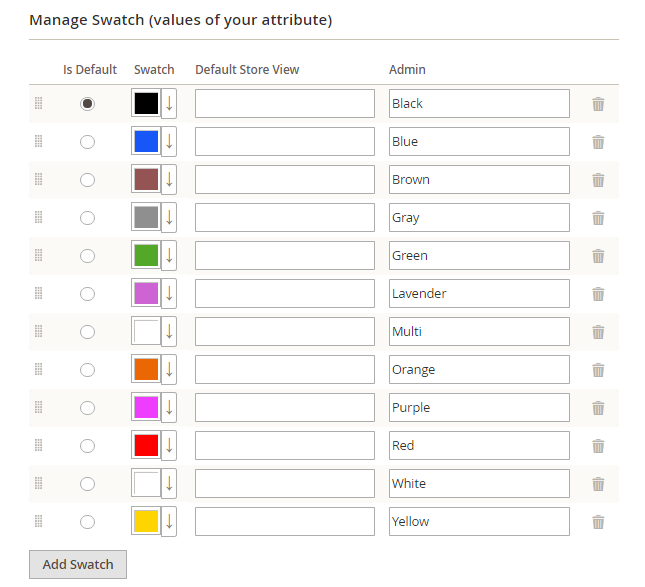
Catalog Input Type for Store Ownerto Visual Swatch. - Under
Manage Swatch, click onAdd Swatchto add a new definition to the bottom of the list. Then, do the following:
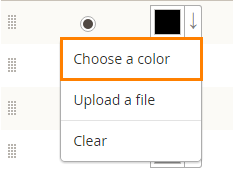
- On the swatch menu, select
Choose a color.
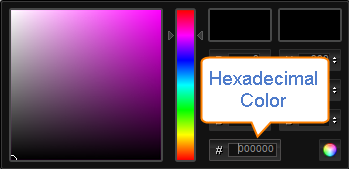
- In the color picker, enter the six numbers that represent the hexadecimal value of the new color in the
#field, and press the Backspace key to delete the current value. Then click on theColor Wheelbutton in the lower-right corner to save the swatch.
- Enter the label for the color in the Admin and Default Store View.
- Mark the checkbox under the
Is Defaultto set the default color as you need. - Enable to change the order when click on the icon in the top left of Manage Swatch table and drag it to the new position.
- When complete, click on
Save Attribute, then flush the cache inCache Managementtab. - Finally, go to
Editmode in each product, and updateColorattribute with the correct swatch. To update multiple products at the same time, follow the steps below.
Method 2: Upload a Swatch Image
- Collect the swatch image that is correct for your product.
- On the Admin sidebar,
Stores > Attributes > Product. - In the grid, find and edit the
Colorattribute. - Set
Catalog Input Type for Store Ownerto Visual Swatch. - Under
Manage Swatch, click onAdd Swatchto add a new definition to the bottom of the list. Then, do the following:- On the swatch menu, select
Upload a file.

- Choose the desired image from your computer.
- Repeat these steps for other swatch images.
- Enter the label for the color in the Admin and Default Store View.
- On the swatch menu, select
- When complete, click on
Save Attribute, then remember to flush the cache inCache Managementtab. - Finally, go to
Editmode in each product, and updateColorattribute with the correct swatch. To update multiple products at the same time, follow the steps below.
Step 2: Update your product
- On the Admin sidebar,
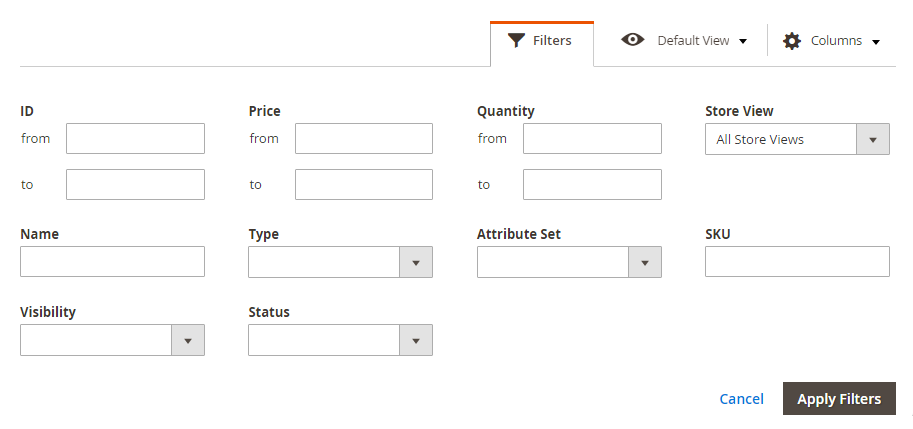
Products > Inventory > Catalog. Filterthe list by Name or SKU to include only the applicable products.
- Mark the checkbox of each product that you want the swatch to apply. And then, set the
Actionscontrol to Update Attributes.
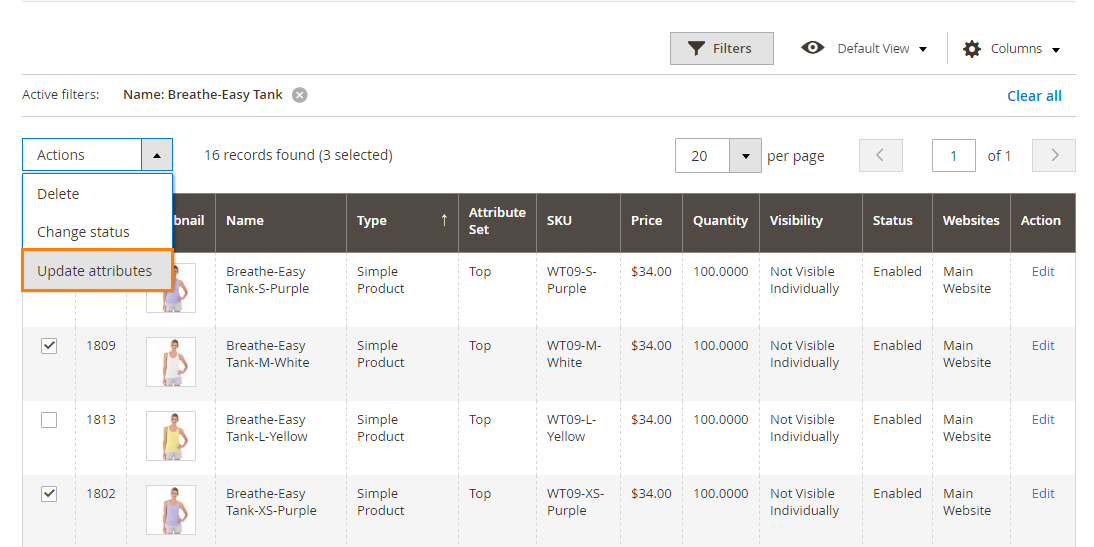
- Look down to the
Colorattribute, and mark the Change checkbox.

Step 3: Save the product
Click on Save to apply the swatch. Then remember to flush the cache in the Cache Management tab.
Reference: Magento 2 user guide
The bottom line
Now Color swatches for your Magento 2 store are ready. Setting this up will definitely improve customers’ experience, as well as bring a great motivation for them to purchase and reduce the product return rates. It also creates a more engaging and professional frontend for your website, so it definitely worth a try, right? Feel free to drop a message when you need more support from us.
Explore Color Swatches in Mageplaza Layered Navigation extension
Related Topics
Looking for
Customization & Development Services?
8+ years of experiences in e-commerce & Magento has prepared us for any challenges, so that we can lead you to your success.
Get free consultant
Recent Tutorials

Change Store Email Addresses


Magento 2 Search Settings: Default Magento vs Mageplaza AJAX Search
Explore Our Products:
People also searched for
- magento 2 swatches
- magento 2 color swatches
- magento 2 color swatch configurable product
- magento 2 swatches on category page
- swatches magento 2
- magento 2 configurable swatches not working
- color swatches magento 2
- color swatch magento 2
- magento 2 configurable swatches
- magento 2 show swatches in product list
- magento 2 create swatch attribute programmatically
- magento color swatch
- magento color swatch configurable product
- magento 2 swatches extension
- magento 2 swatch image size
- magento 2 color swatches extension free
- magento color swatches
- magento 2 configurable product image not changing
- visual swatch magento 2
- swatch magento 2
- magento 2 show out of stock swatches
- magento 2 visual swatch attribute
- magento 2 color picker
- magento 2 add color swatch programmatically
- magento 2 swatches not showing
- magento swatches
- magento swatch
- magento configurable swatches
- color swatches magento
- how to add color swatches in magento
- color swatch magento
- magento color code
- 2.2.x, 2.3.x, 2.4.x
Stay in the know
Get special offers on the latest news from Mageplaza.
Earn $10 in reward now!


