
How to Create & Configure Dependent Attributes in Magento 2
With a big catalog of 234+ extensions for your online store
There are many questions that you always ask yourself over and over again which are:
- How can you satisfy your customer?
- Which marketing strategy is the most suitable for your store?
- Which point does your customer evaluate you higher than other rivals?
Due to the virtual interaction, the store hardly has the chance to understand the client’s behavior. Therefore, a different method to gain customer opinion is vital for enhancing the success rate of your business strategy.
Let’s dive into this blog and learn more about dependent attributes.
Table of Contents
- What is a dependent attribute?
- Limitation of Magento 2
- Enhancement created by Dependent Attributes
- How to create new dependent attributes
- How to create dependent attributes
- Results on the frontend
- Final words
What is a dependent attribute?
A dependent attribute is a type of customer attribute which will only appear when the admin’s set condition is fulfilled. On the frontend, customers can see this attribute only when they selects a certain option of the parent value.
Limitation of Magento 2
The Customer Attributes of Magento 2 is a useful function that supports you to create additional fields to add in account information, address book, and billing information located in the customer account. And after that, the collected data will help you to utilize the information for a variety of different purposes.
However, Magento 2 only stops at providing the general function instead of an enhanced experience. In specific, the native Magento does not provide the ability to develop dependent attributes.
Despite the aforementioned feature does not bring you any cash flow or boost the store’s conversion rate, the dependent attribute is still an appealing function, which possesses potential benefits for the users.
If you are curious, just moving on to the following section to learn all the advantages it can provide for you.
Enhancement created by Dependent Attributes
Learn more about your customer without making them bounce off the sites
With the original function, you can create some extra fields. And, with Magento 2 Customer Attributes extension, you can create unlimited fields to gain insights into the customer’s buyer pattern.
However, the layout of the login or account page will be negatively affected. Why? It is because a long list of the required fields will scare customers to bounce off the sites!
Therefore, dependent attributes will be a great way to reorganize additional fields on your sites, It will only appear when the customer fills in a specific value in the previous fields. After they have already filled in several fields, they will be more willing to continue and finish what they have started.
Attain important data for marketing strategy
If customers willing to stay and finished filling all the fields. Stores can gain informative data to analyze and research deeper into their buying behavior. This will bring significant benefits to the marketing team, the information will increase the success rate of your store campaign. The checkout and registration will be more customer-focus. Dependent attributes will also make the answer to the parent question becomes more specific.
How to create new dependent attributes
In general, to create new dependent attributes in Magento 2, we need to execute the process in 3 main steps:
- Step 1: Fill in all necessary in Customer Attributes into Properties
- Step 2: Type in the Manage Label’s titles to alternate attributes name which you want to display on the store sites
- Step 3: To show your desired information in the attributes, you can insert in the information in Storefront Properties
Step 1: Enter full information about Customer Attributes into Properties
First and foremost, you have to access the Admin Panel with your account. On the vertical taskbar, please choose Customers > Attribute > Customer. In the customer area section, continue to select Add New Attribute on the upper right corner. Now, you need to create new value with the aforementioned steps.
1. Attribute Properties
The first field which is Default Label is a required field for you to fill in the name you want to set for new Attribute. The attribute tile will appear right away when you still fill in the data. Also, keep in mind that this field is unable to be left blank. If you skip to fill in the field, a notification will appear: “This is a required field”
Next, select the attributes desired input type in the input type field. You have the opportunity to create a variety of questions with 12 types of questions.
The third field is Value Required which helps you set the attribute to be a required field. Choose Yes, if you want to set it as a required field to add in the value. If it is vice versa, select No so that it’s not a required field. After you set Yes, an icon will display as a mark on the left of the attribute.
2. Advanced Attribute Properties
For the Attribute Code field, enter the code you want to attach with the attributes and make sure not to add space and less than 30 symbols. This code will be used for internal purposes only. If it is left blank, the default value will depend on the Default Label field.
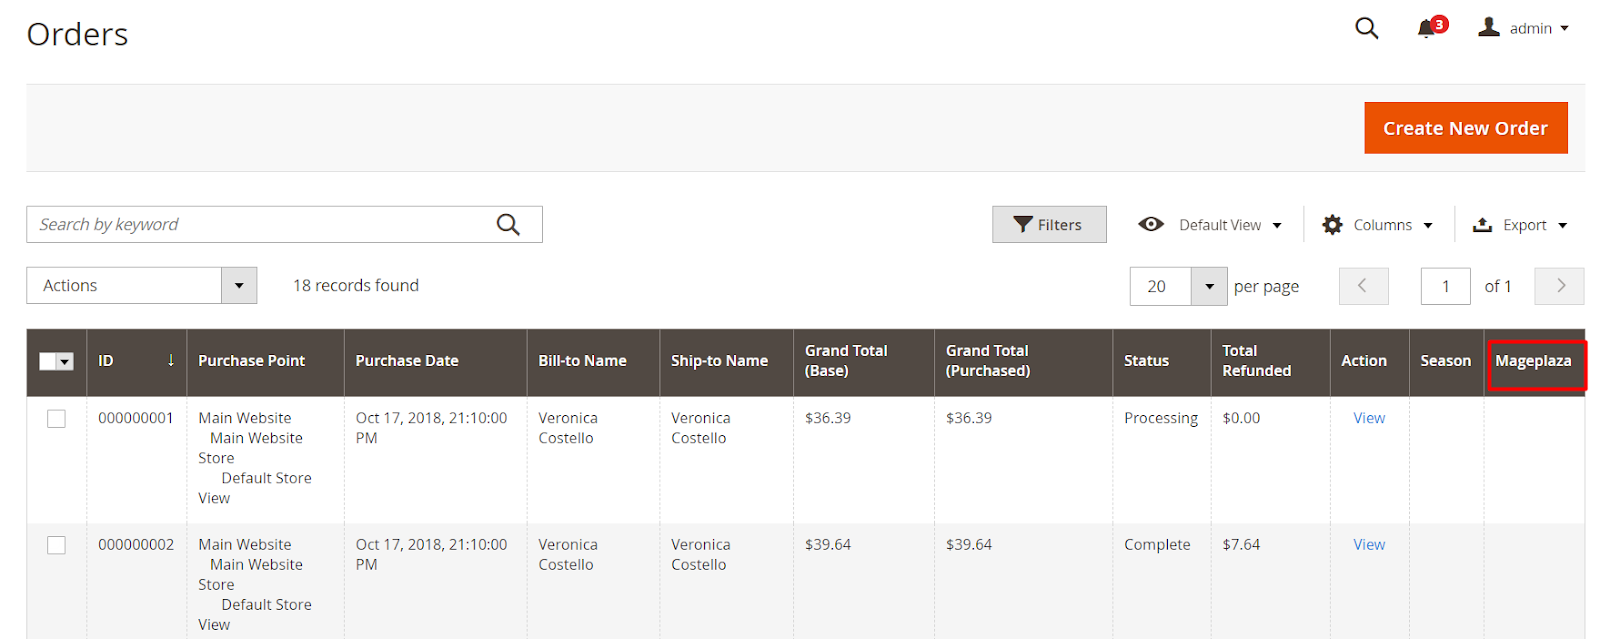
Add to Customer Grid: select Yes to display the attribute in the Customer Grid. In the Customer Grid, the column will be set into Column options, Filter Option & Search Option.
For Add to Sale Order Grid, admins can add the attribute into Sale Order Grid by choosing Yes. In the Sale Order Grid, this column will be added into Column options, filter option & search options.
3. Set to become a Depend field
To set special dependent attributes, you should not forget to set this function. The depend field will appear when customers select a parent field. To make it perform smoothly in the backend, you need to set the input type as Dropdown or Single Select with Image. The field can be displayed on the frontend, admin customer form, and admin checkout.

Finally, select in the Select Value Depend field help to choose the options in the selected independent field. The attributes will appear when shoppers click on set values.
Note: The display ability of attributes depends on the options you specifically select.
Step 2: Fill titles in Manage Labels
In this step, the function helps you to adjust the attribute name that you want to show on the frontend instead of displaying the Attribute name you set in the first step. If the field is left blank, the store view will display the attribute name you have set in the Default Label field.
Step 3: Select the position to display attributes
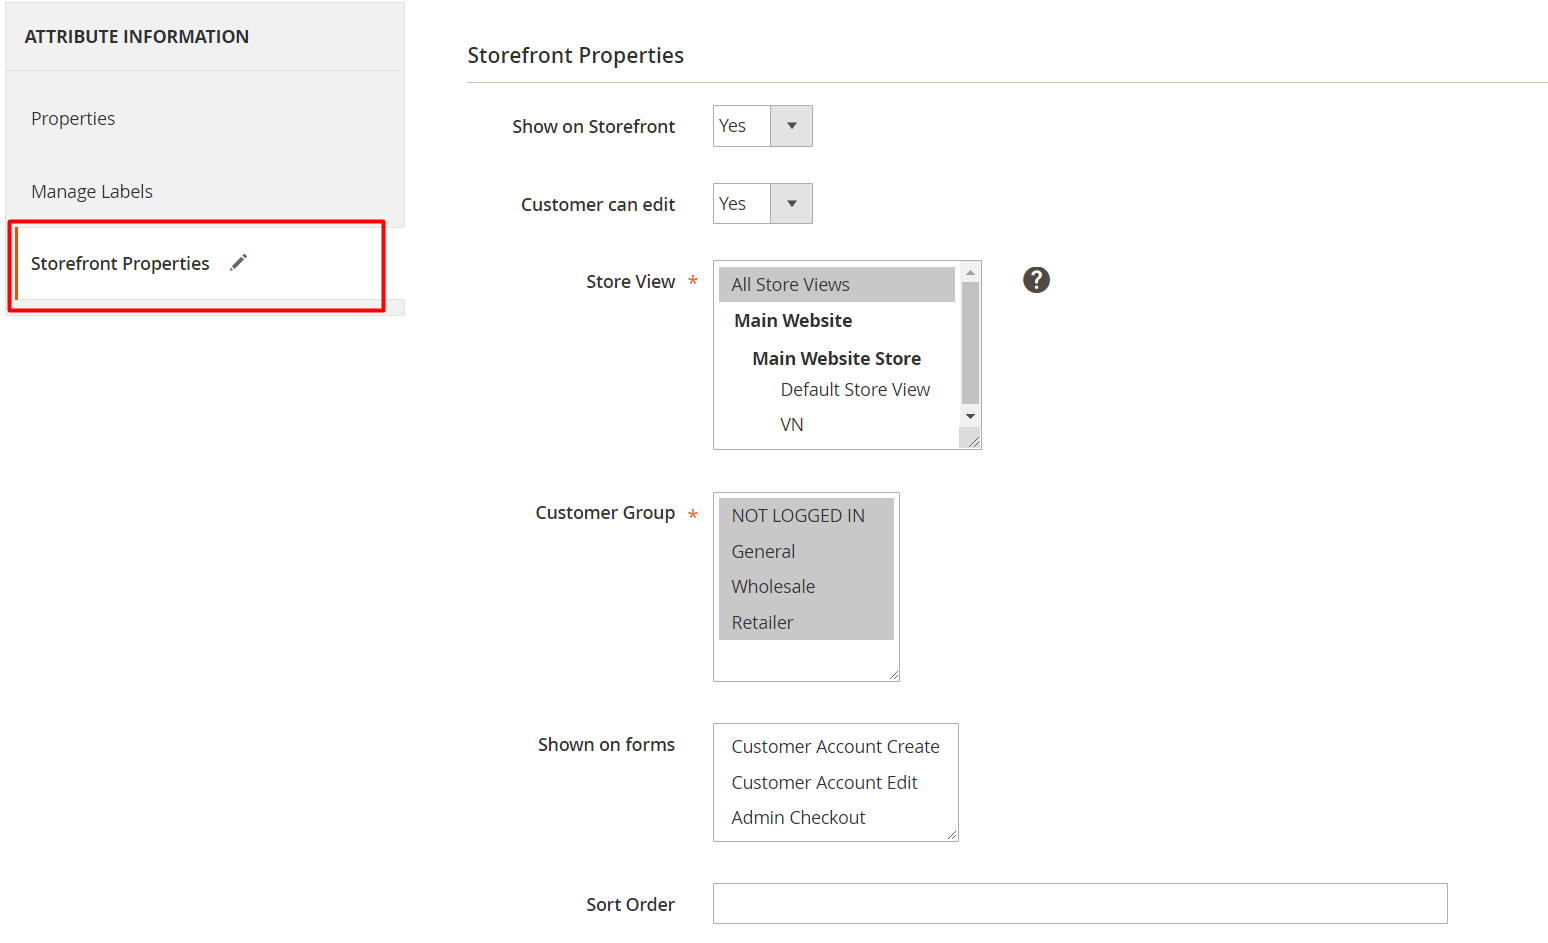
Select Yes in the below field to:
- Enable Show on Storefront field to display the attributes on Storefront. In addition, the fixed attributes in the storefront properties in the system cannot be edited with this method.
- Enable Customer can edit field to allow customers to edit the field.
The visibility can be restricted with the setting via the Store View field or restrict its availability based on customer group.
Hence, the extension can display on forms of your stores with 4 options which are Admin Checkout, Frontend checkout, Customer Account Edit, Customer Account Registration. In detail, you can find an informative article to guide you add these attributes to checkout or customer grid.
Results on the frontend
After you have successfully configured according to my guidance, the dependent attribute will perform smoothly like this image below. After that, you can gain raw data to analyze your buyers to optimize your site performance as a customer-focus business.
Final words
All in all, this is a simple article to make you aware of how dependent attributes can bring you benefits and how it can be created. As people always say little things make a difference. A small question created by a dependent attribute can be the key to help you get your business strategy planned on the right track.
This feature is included in the Mageplaza Customer Attributes extension developed for Magento 2. There are many other handy functions for you to discover in this plugin such as generating customer address attributes.
& Maintenance Services
Make sure your M2 store is not only in good shape but also thriving with a professional team yet at an affordable price.
Get Started

Jennie
New Posts


May 2023

Stay in the know
Get special offers on the latest news from Mageplaza.
Earn $10 in reward now!


