
How to integrate Shopbot with Magento 2
Table of Contents
What is Shopbot?
Shopbot is one of the biggest price comparison tools in Canada. This website has helped millions of shoppers to refer their concerned products and compare prices to choose the best ones. On the other side, it also opens a huge market for sellers all over the world. The high quality of Shopbot’s traffic drives shoppers at the last step in their shopping journey to buy and reach the final stage of the transaction.
Since the product data fields in Shopbot and Magento 2 are fully compatible, store’ s admin can apply these required fields to their product data, which generates Product Feed. Since Magento 2 now does not support feed generating, we need to use Product Feed extension. Moreover, Shopbot supports CSV or XML feeds. In this tutorial, Mageplaza will guide you to upload the feed file in CSV format.
Countries using Shopbot:
- Canada
- Australia
Fields in Google Adword template:
- Required fields
- ID
- Product Name
- Product’s URL
- Product’s Category
- Image URL
- Sale Price
- Product Description
- Product Code
- Brand
- Optional fields
- Promotional Phrase
- Color
- Model
How to Integrate Shopbot with Magento 2 step by step
Step 1: Create a product feed in Shopbot
Because Magento 2 does not support to generate product feed, in this article, we introduce the Product Feed Module by Mageplaza.
To begin with, go to Products > Catalog > Product Feed > Manage Feeds > Add New Feed
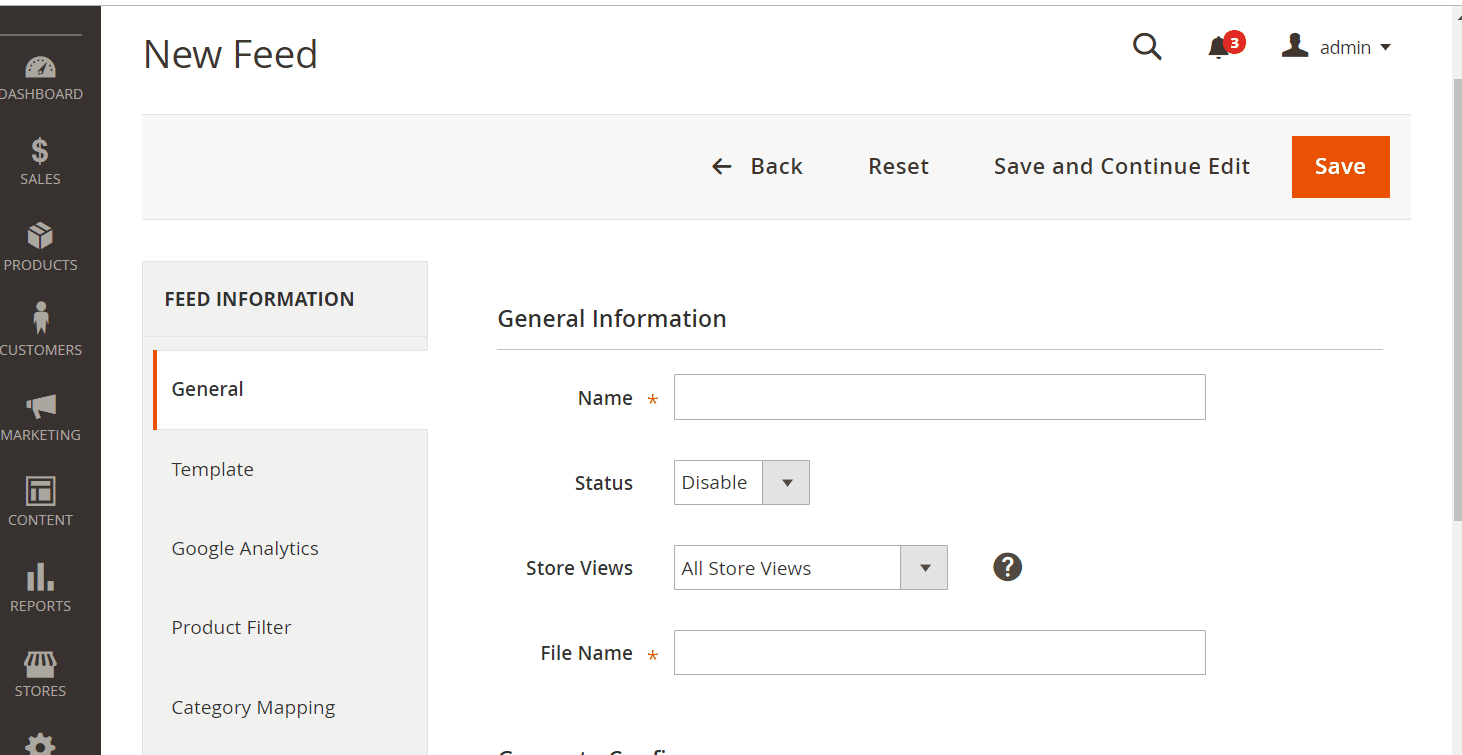
1.1 Insert information needed in General information
Then select Cron job to generate feed automatically, whereas Manual allows admin to create feeds manually.
1.2 Choose template: Shopbot CSV

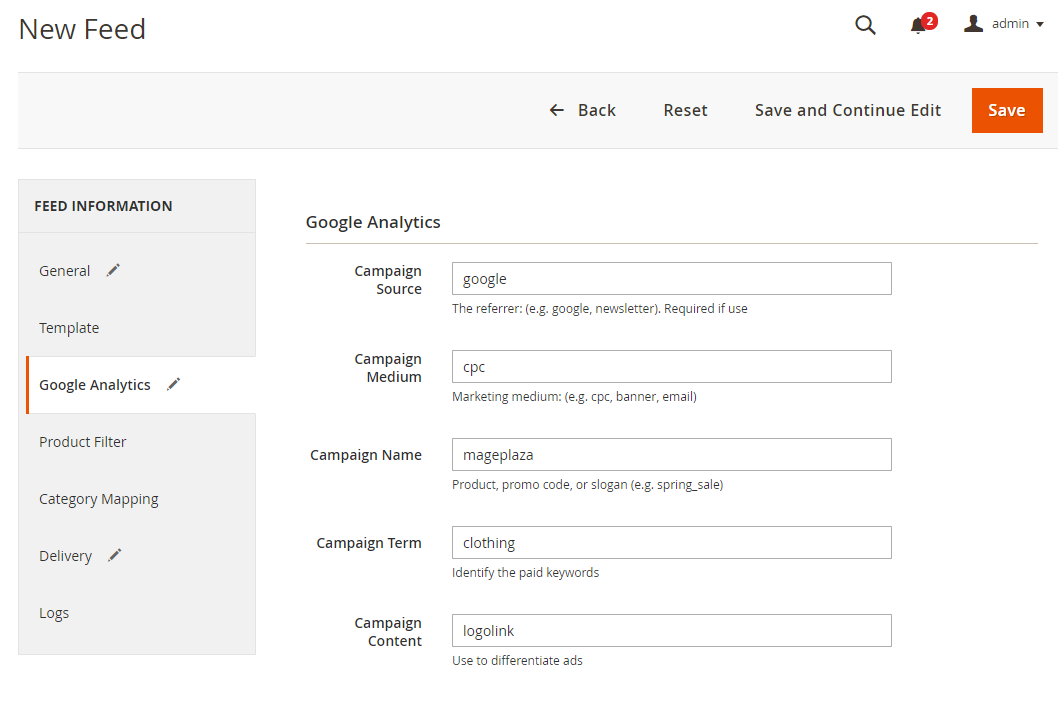
1.3 Insert information in Google Analytic field
1.4 Select the conditions to export files

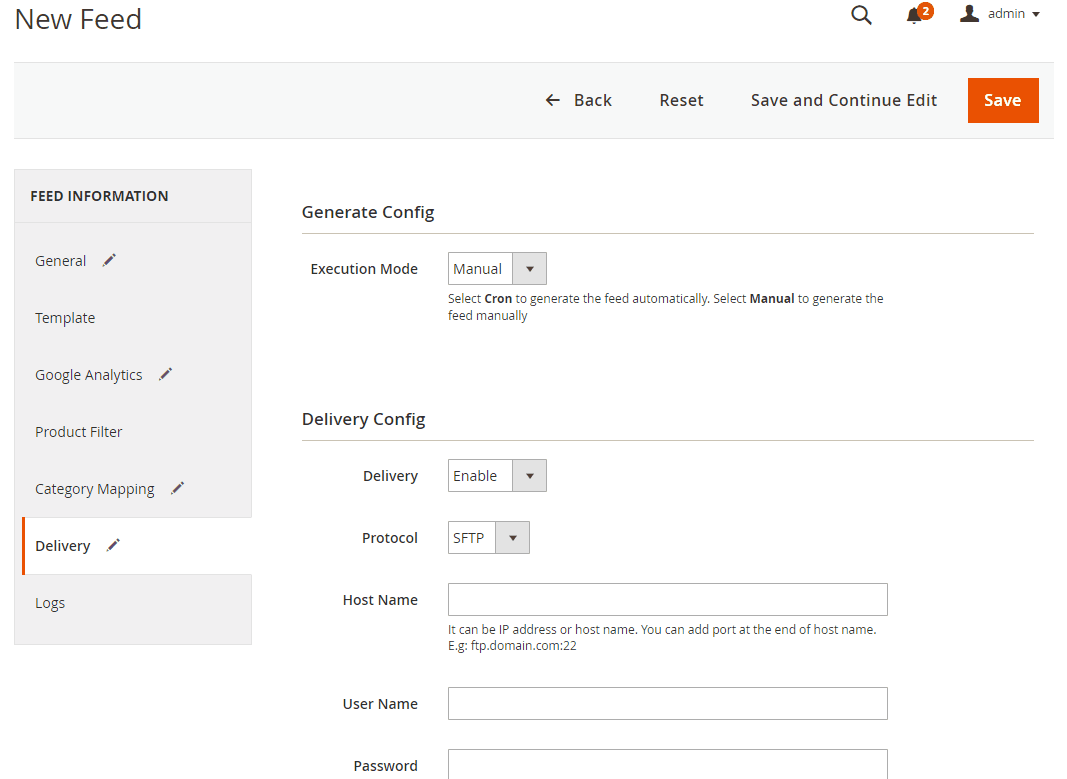
1.5 Choose the protocol to upload exported files (SFTP or FPT)
1.6 Finish export feed
- Save the configuration
- Click
Generateto export and upload files to the server - Then download files from the server or
Manage Feeds
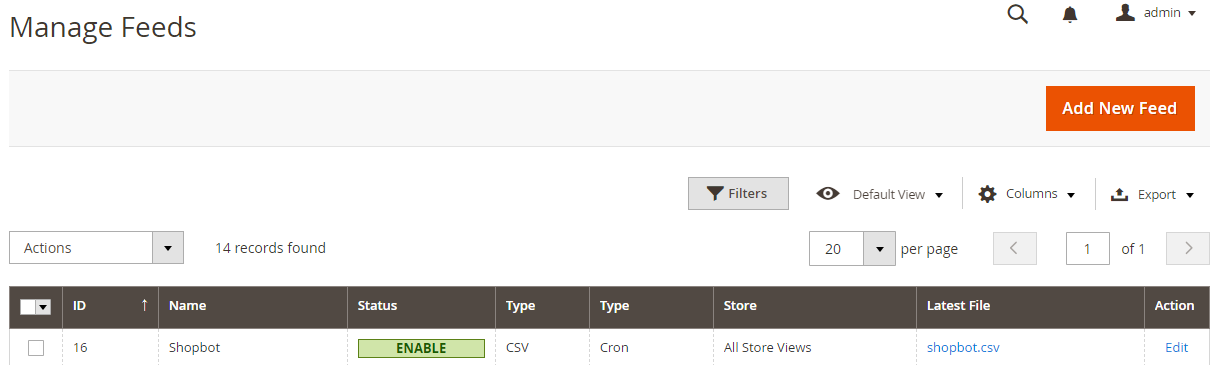
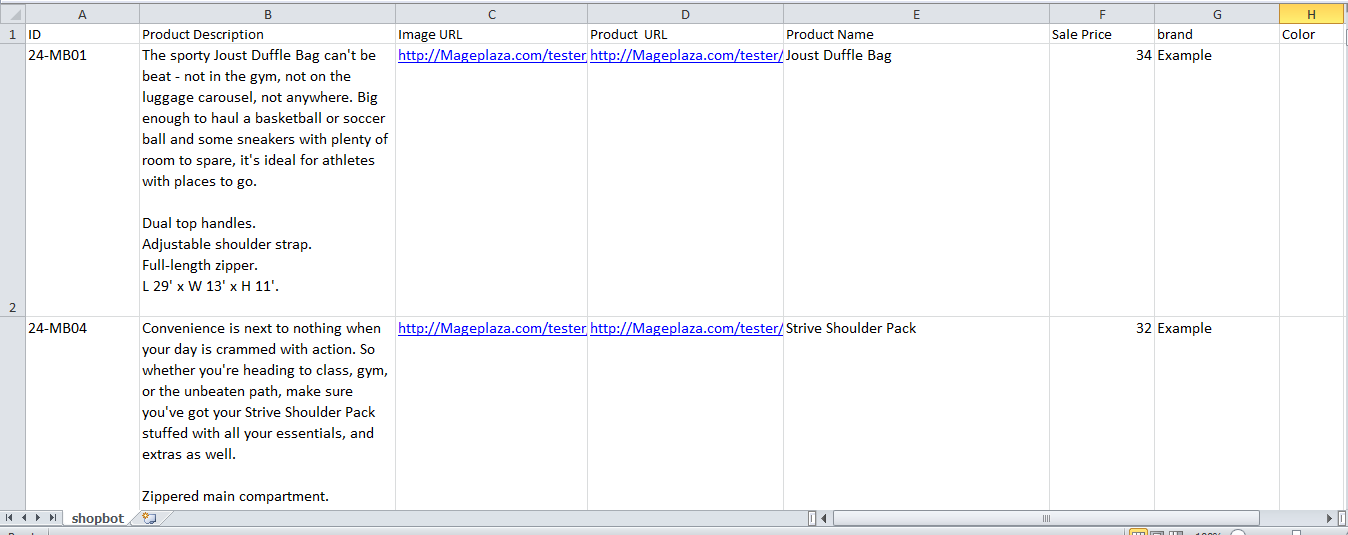
The file results after using Product Feed extension is as below:
Step 2: Register and upload product feed to Shopbot
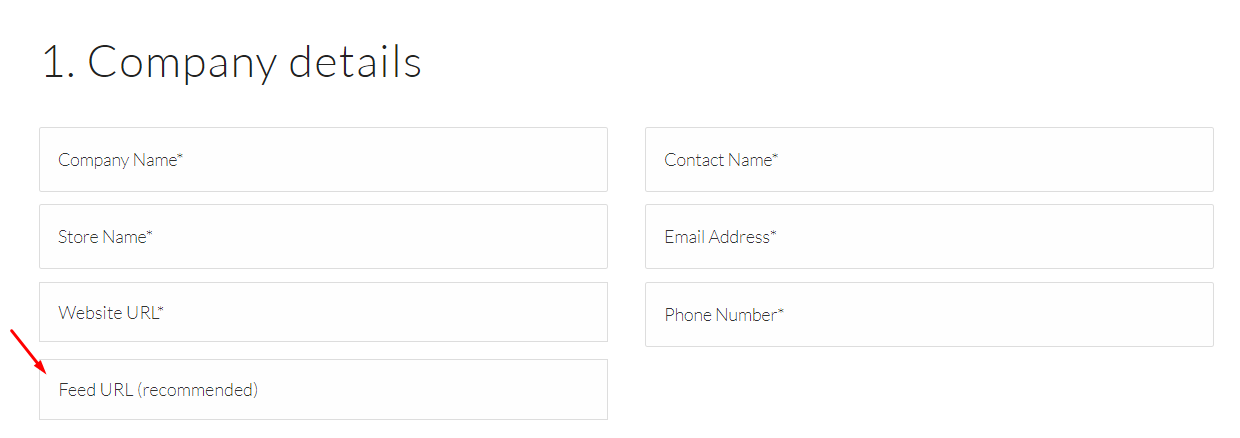
- Upload the feed and fill in your company details
- Firstly, please visit the site upfile.vn to get your product feed link which has been created. Click and drag your file, start downloading and copying the feed link.
- Access to the shopbot.business/get-started link to register an account with Shopbot. Then copy the feed link and fill in your company details below
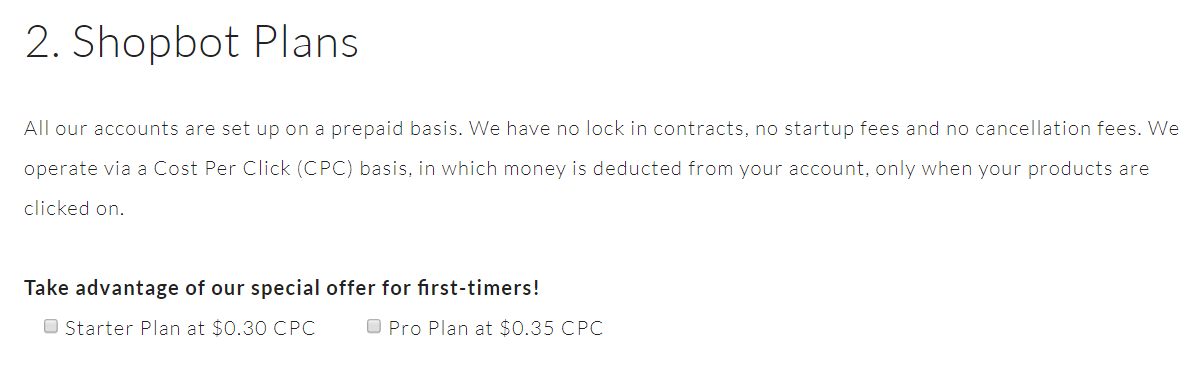
- Select your Payment plan
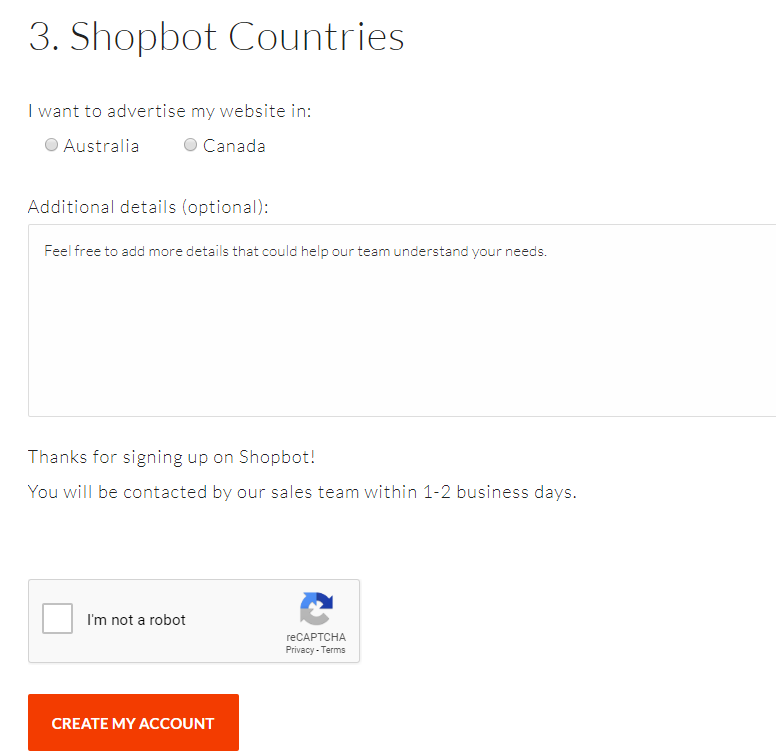
- Choose the countries for advertising
Results
After uploading the feed file, it takes 1-2 days to approve your registration and submission.
Conclusion
This topic provides you the guide to create data feed using Mageplaza Product Feed and how to upload a feed to Shopbot. Please visit here for more detailed features of this module.
Related posts
- How to integrate Google Shopping with Magento 2
- How to integrate Google Adwords with Magento 2
- How to integrate Bing Ads with Magento 2
- How to integrate eBay Commerce Network with Magento 2
- How to integrate Kelkoo Group with Magento 2
Magento API Integration Service by Mageplaza
Connect your store with any 3rd-party software and boost customer experience quickly and efficiently.
Learn more
Back Ask Mageplaza