
How to Configure the Wishlist in Magento 2
With a big catalog of 234+ extensions for your online store
Wishlist is a great tool to keep customers in case they are not ready to purchase instantly by saving all the wanted items for them to add to cart any time. Configuring Wishlist in Magento 2 reminds shoppers of the items they are considering, and simplifies the process when they come back to make purchases. In this post, we will show you how wishlists work, and how to set up a wishlist for your Magento 2 store.
How does Wishlist in Magento 2 work?
The wish list can be regarded as a helpful solution for the customer’s shopping, because it is not only a storage of the favourite products but also supports sharing the products with friends easily.
When enabling the Advanced wishlists, the Add to Wish List link will appear on the category or product detail page of each product. You can set as a text link or a graphic image deepending on your current theme. Also, the wish list can be managed well on the dashboard of the customer account.
Each product in the WishList is allowed to share with the customer’s friends by sending the email from a store email address. Meanwhile, the content of the email is flexible to customize by the clients and the email template and the email sender are configured in the Magento configuration.
For a product with many options, when the customers add it to the wish list, they will appear as the individual items in the list. For other situation, if the same product is added many times to the wish list, instead of creating a new space for a new addition, the quantity of the product is updated automatically.
Read more about Magento 2 Wishlist
How to configure the Wish List and Wish List Sharing in Magento 2
Configure the Wish List
Configuring the wish list means you will set the template and sender of the email that are used for sharing the list.
- On the Admin Panel,
Stores > Settings > Configuration. - Under
Customer, clickWish Listtab. - Open the
General Optionsection, choose Yes to enable the list.

- Open and setup in the
Share Optionssection,
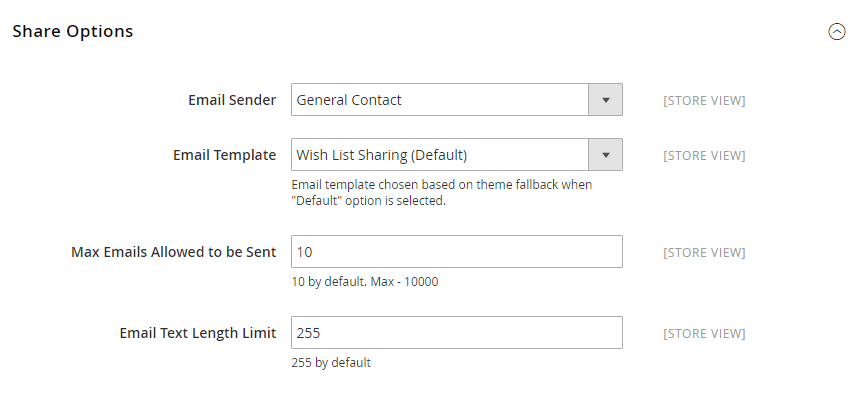
- Select the
Email Sender, the name contact will appear in the email. - Select the Email Template that is applied if customers share the wish list.
- Enter the
Max Emails Allowed to be Sentto limit the maximum number of sent email from 10 to 10,0000. - Enter the
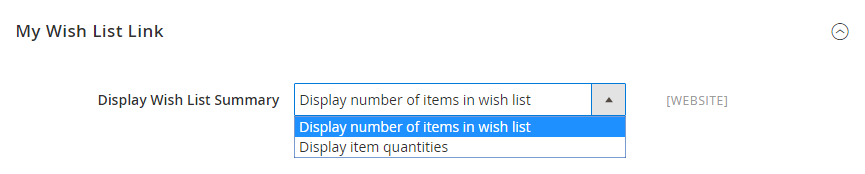
Email Text Length Limitto limit the size of the message. 255 is the default number. - Open the
My Wish List Linksection and allow displaying number of item in wish list or item quantities in theDisplay Wish List Summaryfield.
Save Configto finish.
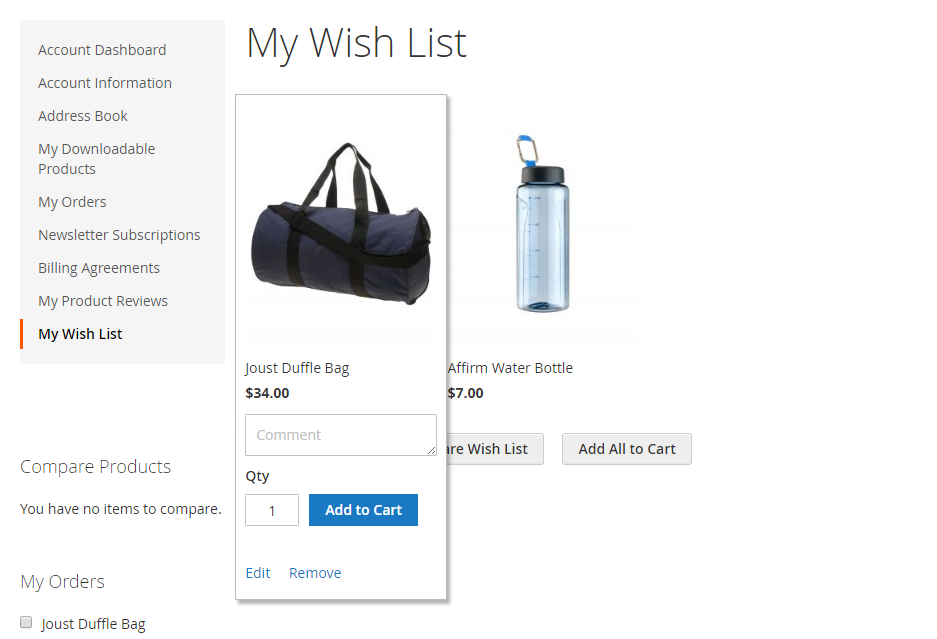
Sharing a Wish List
This setting enables customers to share the wish list with their friends by email. In addition, both the clients and store admin can mange the wish list from the account dashboard and Magento Admin
- Login to customer account, on the
Account Dashboard, selectMy Wish List. - Leave some comments on the
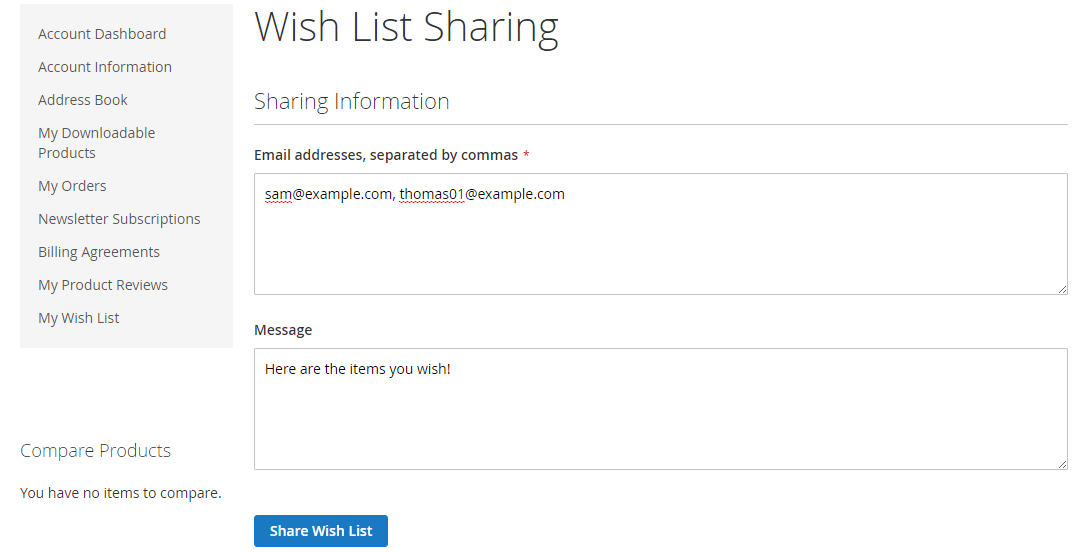
Commentbox of each product. - Here, the sharing wish list is available and you need to do as the following:
- Click on the
Share Wish Listbutton. - Insert as many the email of the recipients as need and a comma is placed among them to separate.
- Enter the
Messagefor the sharing.
- Click on the
Share WishListwhen you are ready.
- If you want to transfer an item to your cart, you need to:
- Open the
My Wish Listpage. - Move to the item you want to transfer.
- Add the number of products to the cart.
- Then click on
Add to Cart.
- Open the
- If want to transfer all wish list products to the cart, click on
Add All to Cart.
Better Wishlist by Mageplaza
You can create a wishlist by following the above tutorial, or take advantage of these amazing features by using our Better Wishlist module:
- AJAX technology supports instant Add to Wishlist popup
- Allow multiple wish lists creation in both the frontend and the backend
- Enable editing, copying, moving, or deleting items among wish lists with ease
- Detailed reports of wishlists to keep track of the performance
- Sharing Wish list via social channels to reach more potential customers
There are also other extensions to create a better experience for customers such as Quick View, Ajax Cart, Social Share, Save Cart.
Explore Magento 2 Better Wishlist
The bottom line
Through this post, hopefully you gain knowledge on how important the Wishlist is and the way to configure Wishlist in Magento 2. If you are in need of a completed solution, consider our Better Wishlist module. We are happy to help you with any concerns, so please contact us if you need further guidance.
Related topics
Looking for
Customization & Development Services?
8+ years of experiences in e-commerce & Magento has prepared us for any challenges, so that we can lead you to your success.
Get free consultant
Recent Tutorials

Change Store Email Addresses


Magento 2 Search Settings: Default Magento vs Mageplaza AJAX Search
Explore Our Products:
People also searched for
- magento 2 wishlist
- wishlist magento 2
- magento 2 enable wishlist
- magento 2 add to wishlist
- wishlist magento
- magento 2 add to wishlist programmatically
- add to wishlist button magento 2
- magento wish list
- magento wishlist without login
- magento 2 wishlist url
- magento 2 wishlist without login
- magento wishlist
- magento 2 disable wishlist
- disable wishlist magento 2
- magento 2 wishlist link
- magento 2 share wishlist
- magento share wishlist
- magento 2 add to wishlist url
- magento 2 check if product is in wishlist
- mangeto 2 wishlist
- magento 2 remove wishlist
- remove wishlist magento 2
- magento 2 get wishlist collection
- magento 1 wishlist
- 2.2.x, 2.3.x, 2.4.x
Stay in the know
Get special offers on the latest news from Mageplaza.
Earn $10 in reward now!


